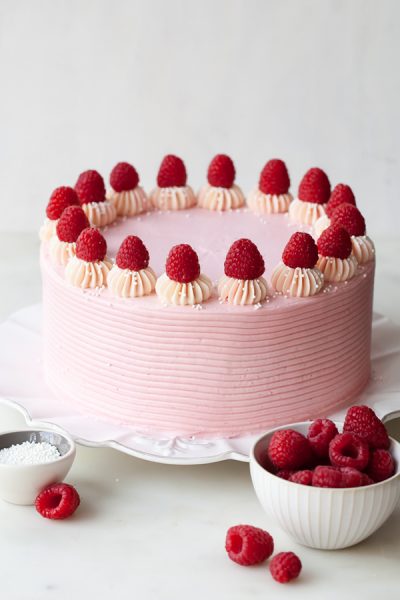
Chocolate Raspberry Cake - moist chocolate cake layered with raspberry jam, topped with raspberry cheesecake frosting and fresh red raspberries. A new layer cake recipe by our contributor, Tessa Huff. For the past decade or so, I’ve tried to make homemade treats for Valentine’s Day. I can recall the failed DIY candy bars, the blobby, hollow “heart-shaped” macarons, the wet, oozing chocolate-dipped strawberries, and even the year our kitchen was packed away in moving boxes and my husband ... Continue Reading
Search Results for: cupcakes
Chocolate Orange Cake
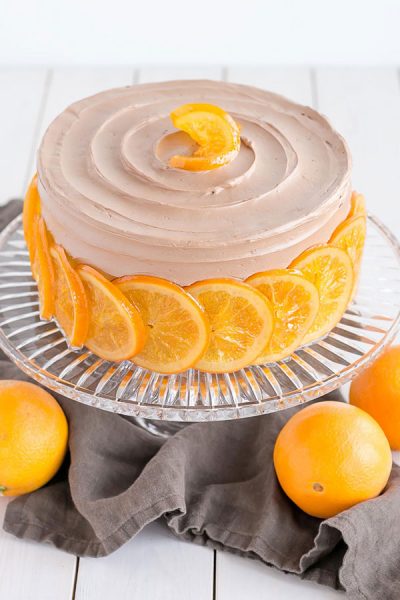
Chocolate Orange Cake - a citrus layer cake recipe infused with orange zest and orange syrup, topped with silky chocolate frosting and candied orange slices. By our contributor, Olivia Bogacki. Happy New Year everyone! You’ve survived through the first bit of January, what I consider to be the most challenging time of the year. Coming off a holiday high and getting back to the real world is not fun and I, for one, am having a hard time letting go of the holiday season. Nevertheless, ... Continue Reading
VALENTINE’S DAY GALLERY
CHOCOLATE RASPBERRY CAKE XOXO CAKE SPRINKLE GIRL CAKE LEOPARD PRINT CAKE CHOCOLATE TOFFEE CRUNCH ROSE CAKE POPS CHOCOLATE TRUFFLE CAKE CANDY BOX CAKE LOVE BUG CUPCAKES MARBLE HEARTS STRIPED BUTTERCREAM WATERCOLOR HEART CAKE CHOCOLATE STRAWBERRY RASPBERRY CHAMPAGNE CAKE CAKE GEMS RASPBERRY BLOOD ORANGE GIANT DONUT CAKE GIFT GUIDE RED VELVET CUPCAKES 10 CHOCOLATE ... Continue Reading
Champagne Mimosa Cake
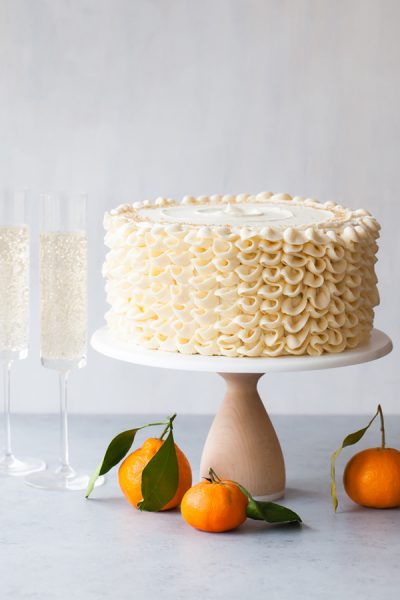
Champagne Mimosa Cake - tender, orange sponge cake smothered with silky champagne buttercream. A new layer cake recipe by our contributor, Tessa Huff. Cheers to surviving the holidays and welcoming a new year! As we pack away our twinkly lights, candy canes, and gingerbread, be sure to keep out those cake pans and baking tools for one last hurrah! December is also a time for reflection and hitting “refresh,” on yet another crazy year. Kick off 2017 with a bang, and a slice of this ... Continue Reading
Candy Snowflakes
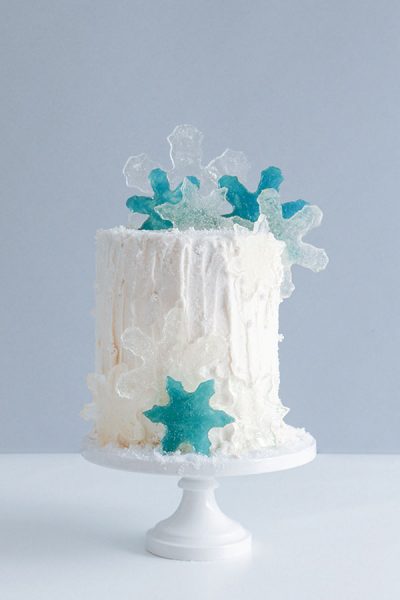
Candy Snowflakes - how to make crystal-like snowflakes using hard candies and cookie cutters. A new tutorial by our contributor Erin Gardner. Make these shimmering candy snowflakes to dress up a winter themed cake for your next holiday dessert spread or for your little princess who just can’t “let it go”. Stick to my icy crystal and blue palette or use candy colors that match your party’s decor. Keep this melted candy technique in mind for other projects as well. Any metal, heatproof ... Continue Reading
Chocolate Sunflower Cake
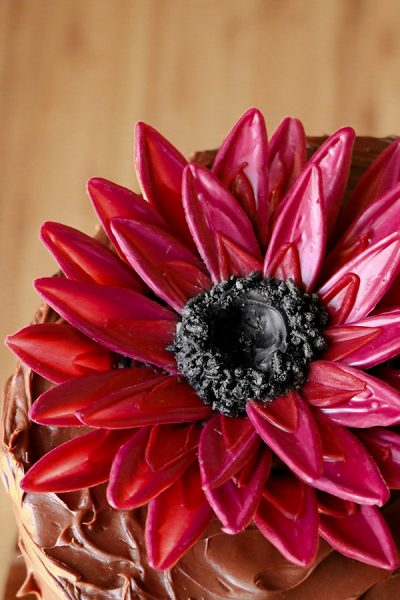
How to make a giant chocolate sunflower cake, using chocolate candy coating and everyday tools. A new cake tutorial by our contributor Erin Gardner. My Chocolate Flower Cake concept from last spring is getting a fall makeover! An oversized bloom made of chocolate is a fun and easy way to quickly dress up a buttercream cake. With a few simple ingredients, and tools you probably already have around the house, you'll create a stunning fall cake. These techniques could just as easily be ... Continue Reading
Cinnamon Roll Layer Cake
Cinnamon Roll Layer Cake with cinnamon in the cake and frosting and the most wonderful cinnamon sugar glaze soaked into the cake layers. A recipe from the new cookbook Simply Beautiful Homemade Cakes by our contributor, Lindsay Conchar. I’m so excited to share this cake with you today and give you a peek inside my cookbook, Simply Beautiful Homemade Cakes. I’ve been working on this book for a year and half now and it’s such fun to share it with everyone. As you can probably tell from ... Continue Reading
Chocolate Bourbon Pecan Cake
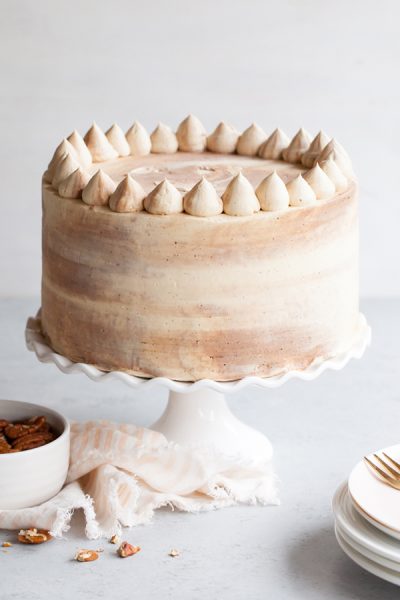
Chocolate Bourbon Pecan Cake - chocolatey cake with brown sugar buttercream infused with bourbon and pecans. A new layer cake recipe by our contributor, Tessa Huff. Deep into fall and stormy weather season, I find myself searching for foods of comfort and decadence. And with the holidays approaching at lightening speed, traditional flavors float up to the top of my baking “to-do” list. This cake started out as a pecan pie. After a few unexpected twists and turns, it evolved into this ... Continue Reading
Black Cat Cake
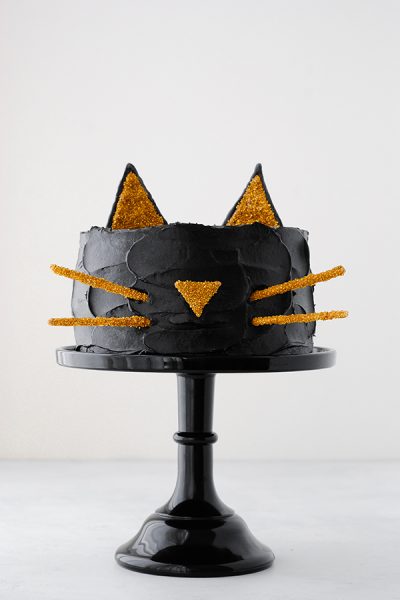
Black Cat Cake! Celebrate Halloween with this adorable cat cake with a simple silhouette face and gold glitter cat ears! If you hadn't noticed, cats are seriously having a moment right now. Everywhere you turn, adorable cat faces are popping up on purses, shoes, shirts, iPhone cases, socks, hats and the list goes on. I can't even count the number of retailers selling bedazzled cat ear headbands this fall! Soooo, in true The Cake Blog fashion, we've translated this trend into cake, first ... Continue Reading
Warm Apple Cake with Salted Caramel Gelato
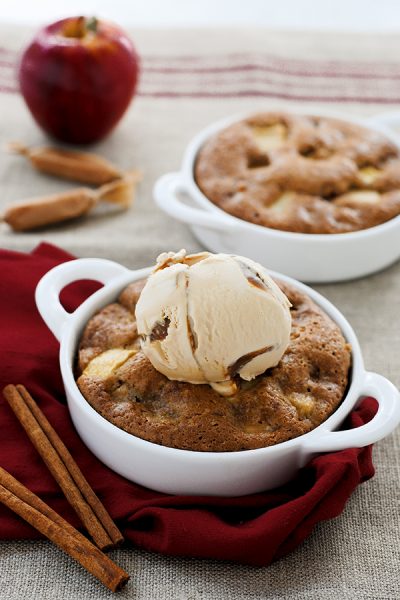
Today's recipe is sponsored by Unilever Ice Cream. We're celebrating National Dessert Day with Breyers® Gelato Indulgences™. Yes, today is National Dessert Day! Like we need an excuse to eat dessert, but if you're looking for an excuse, a national holiday sounds like the perfect justification. And this warm apple cake with chunks of apple, brown sugar and cinnamon will have you looking like a dessert-making rock star when you pull out freshly baked, individual bowls of heaven for the ... Continue Reading
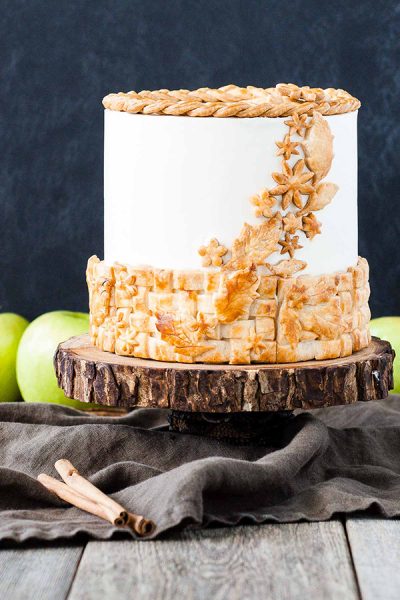
Apple Toffee Crunch Cake
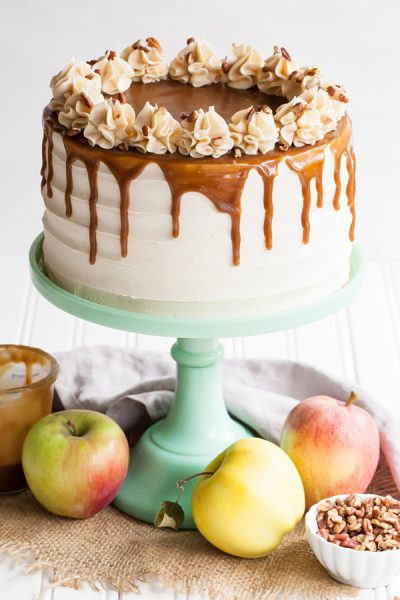
Apple Toffee Crunch Cake - fresh apple cake with crunchy pecans, cinnamon buttercream and a toffee sauce drip. A new layer cake recipe by our contributor, Tessa Huff. I’ve resisted all-things apple, pumpkin, and spice for too long, but now it is definitely time to dive into fall baking head on! I’m kicking off my favorite season with this Apple Toffee Crunch Cake, and I can’t wait to share it with you all. So bundle up in your boots, scarves, and favorite flannels, and let’s get to ... Continue Reading
Dark Chocolate Honeycomb Cake
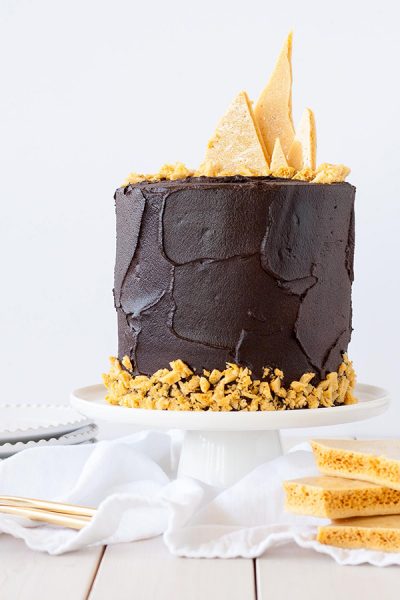
Dark Chocolate Honeycomb Cake - a rich chocolate layer cake recipe with ultra dark, fudgy frosting and homemade honeycomb. Created by our contributor, Olivia Bogacki. It’s (almost) officially Fall, and I am one happy camper. I kicked off Fall a bit early last month with my Apple Pie Cake and I’m keeping that theme going with this moody Dark Chocolate Honeycomb Cake. To me, chocolate cake is the ultimate comfort food. Perfect for those cold months when you’re curled up under a ... Continue Reading
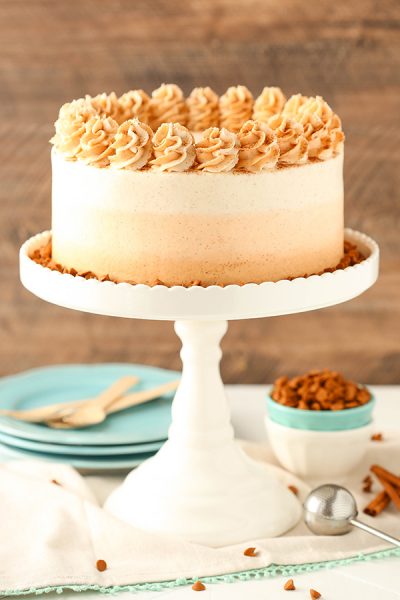
Caramel Cappuccino Cake
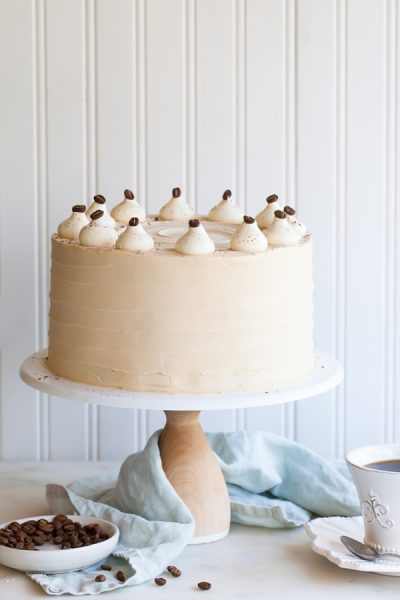
Caramel Cappuccino Cake - espresso cake paired with caramel buttercream frosting, topped with whole coffee beans and a sprinkle of cocoa powder. A new layer cake recipe by our contributor, Tessa Huff. As we approach fall, yet are still experiencing warm summer temperatures, August calls for something just plain delicious. Being in between seasons, I didn’t want to make a recipe using the last of the summer produce that might be gone any day now nor did I want to jump the gun into fall ... Continue Reading
Apple Pie Cake
Apple Pie Cake! A layer cake recipe with hints of cinnamon and nutmeg, fresh apple pie filling, buttercream frosting and braided pie crust lattice. Created by our contributor, Olivia Bogacki. Anyone else love fall as much as I do? It’s the best season ever. I seriously cannot wait! My husband thinks I’m crazy because I actually don’t like summer. At all. If I’m away on vacation and somewhere tropical, I like it to be sunny and hot, but otherwise I’ll take my overcast days and mild ... Continue Reading
S’mores Cake
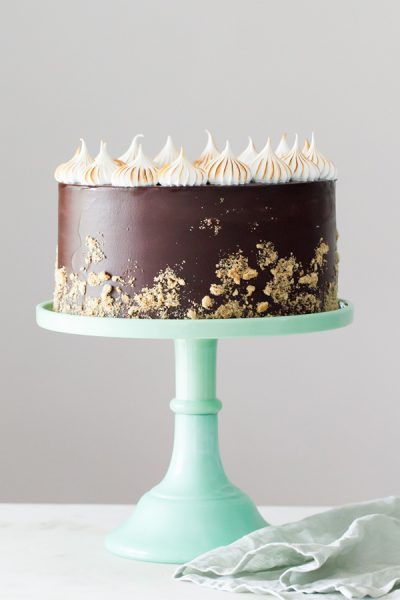
S'mores Cake - Chocolate cake with graham cracker buttercream filling, chocolate ganache frosting and toasted marshmallow meringue. A s'mores inspired layer cake recipe by our contributor, Tessa Huff. For some, the perfect summer vacation isn’t without umbrella drinks and resort pools, but for others, nothing beats a beach bonfire or weekend campout among family and friends. Personally, I love a little of both, but living in the city does make me yearn for nature and a bit of solitude ... Continue Reading
Banana Split Cake
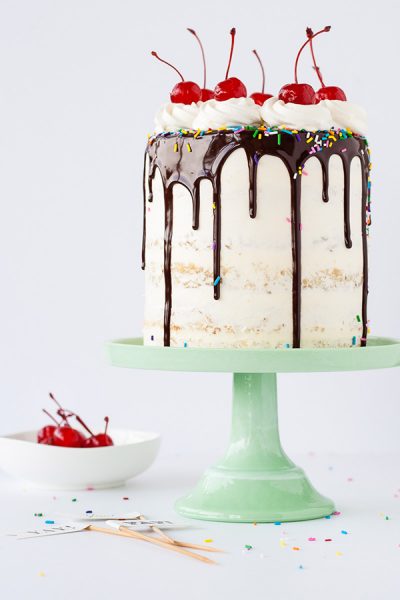
Banana Split Cake! Layers of banana cake and vanilla buttercream, with pineapple and strawberry fillings, all topped off with a silky dark chocolate ganache, sprinkles, whipped cream, and cherries. A layer cake recipe by our contributor, Olivia Bogacki. Hellooo Summer!! Is 2016 totally flying by, or is it just me? I know it’s not technically summer everywhere (Hi Australia!) and some places have summer all year round, but here on the west coast we’re definitely kicking it into summer ... Continue Reading
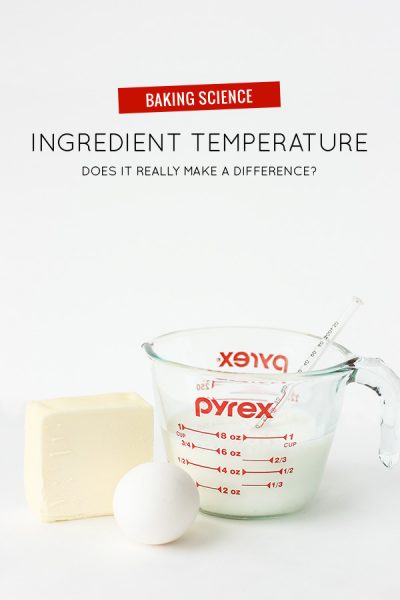
Does Ingredient Temperature Matter?
Our contributor, Summer Stone-Polzel of Cake Paper Party, is back today with a new baking science experiment.... Most cake recipes prompt the baker to begin with room temperature ingredients. While I generally comply with most of my ingredients, I admit I can often be caught tossing a cold egg or chilly milk into my batter. Typically in a hurry, I would think, “What difference does it really make?” I finally decided to challenge my rebellion and see what happens when you start with cold, ... Continue Reading
Lemon Blueberry Cake

Lemon Blueberry Cake. A tender layer cake recipe brightened with lemon juice, lemon zest and wild blueberries, frosted with a tangy sweet lemon cream cheese frosting. Today's cake is tart yet sweet and perfect for summer. A tender butter cake is brightened with a hint of fresh lemon juice and flecks of lemon zest. Wild blueberries dancing throughout each layer give the cake a pop of contrast, both in appearance, texture and taste. Then comes the dreamy cream cheese frosting that boasts ... Continue Reading
Which Flour Is Best?
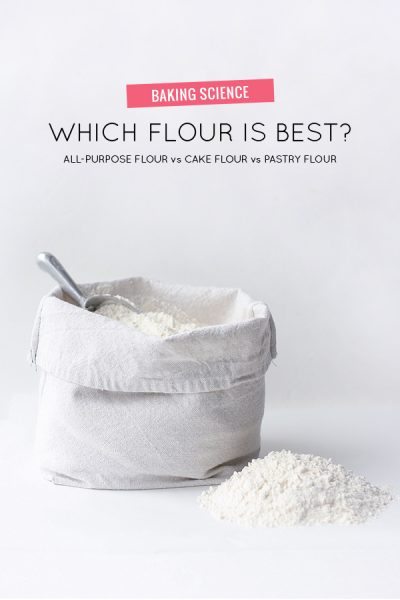
Our contributor, Summer Stone Polzel of Cake Paper Party, is back today with a new baking science experiment.... Flour is one of the most important ingredients in a cake recipe. It not only is the structural workhorse of a cake but provides important flavor and textural elements. Choosing the best flour for a cake recipe can be tricky. There are many options on the market and depending on where you are in the world, certain flours may or may not be available. Here I will try to clarify some ... Continue Reading
Funfetti Cake
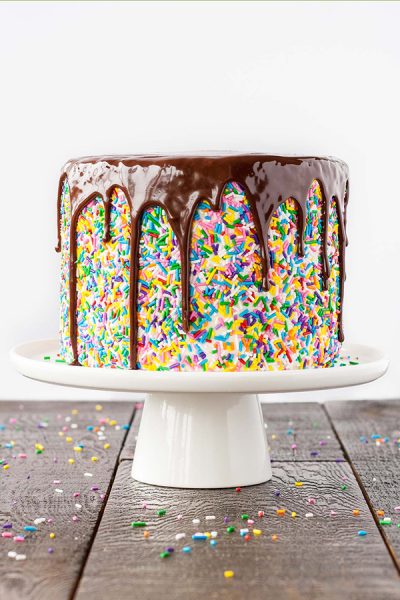
Funfetti Cake - homemade funfetti layer cake recipe made from scratch with sprinkles, fluffy frosting, more sprinkles and a drippy chocolate ganache. By our contributor, Olivia Bogacki. Today’s cake delivers a bold pop of color, mostly because it has been a dreary winter here in Vancouver and I’m literally watching a torrential rain storm outside my window as I type this. I am in dire need of something bright and cheery, and this cake is the perfect ray of sunshine! Don’t let the ... Continue Reading
Chocolate Flower Cake
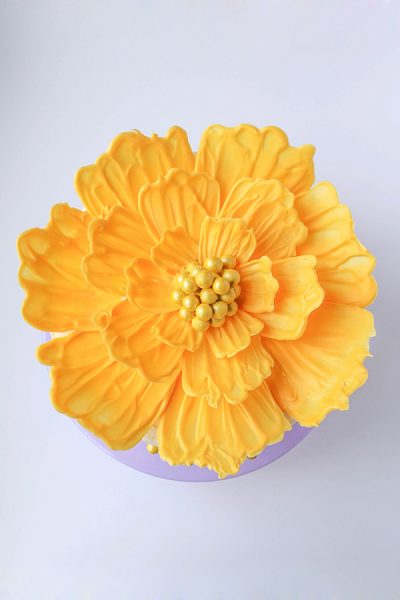
Chocolate Flower Cake - how to make a giant chocolate flower cake, using candy melts and everyday tools. A new tutorial by our contributor, Erin Gardner! My obsession with chocolate flowers continues! What could be better than a delicious and beautiful chocolate flower? A GIANT chocolate flower, of course! Arranged on top of a cake to create a spring dessert pretty enough for any special occasion. From Easter to Mother's Day, birthdays to bridal showers, today's Chocolate Flower Cake ... Continue Reading
Lemon Bundt Cake
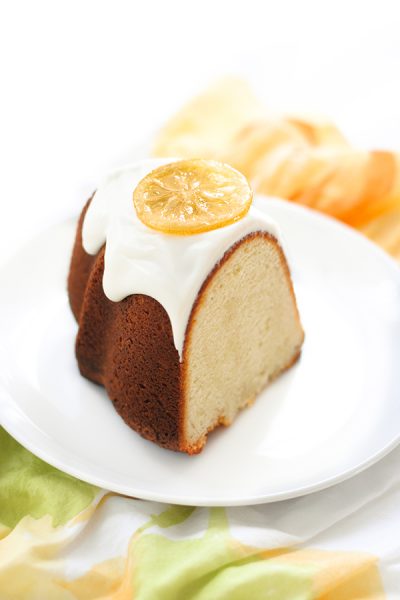
Lemon Bundt Cake - easy lemon pound cake recipe that packs a powerful lemon punch, topped with a relaxed cream cheese glaze and candied lemon slices. Another holiday is almost upon us and I don't know about you, but it feels like Christmas was just yesterday. I love going all out for holidays, but sometimes reality sets in and you have to timebox your projects a tad. You know, so you can actually spend time with your family celebrating the holiday! If you can relate to life being on ... Continue Reading
Easter Gallery
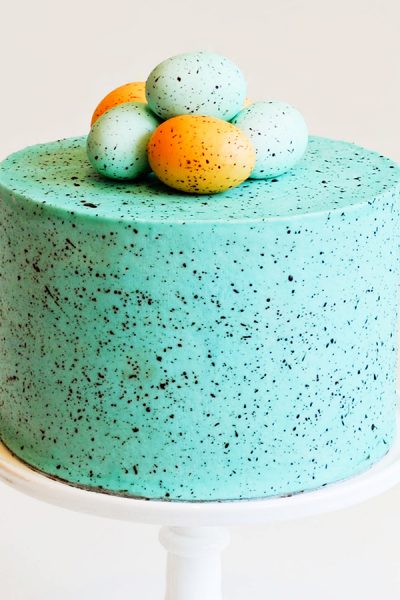
SPECKLED EGG CAKE SPRING WREATH CAKE EASTER EGG CAKES CHOCOLATE DAFFODILS LEMON BLUEBERRY CAKE RAINBOW MOSAIC CAKE EASTER BUNNY CUPCAKES FLOWER SUGAR COOKIES BLACKBERRY LIME CAKE CHOCOLATE BUNNY CAKE BUNNY FACE COOKIES MARBLED CHOCOLATE EGGS LEMON POPPY SEED CAKE CHOCOLATE TULIPS CHOCOLATE FLOWER CAKE GARDEN CUPCAKES COOKIE MOSS CAKE LEMON HONEY CAKE EASTER BASKET ... Continue Reading
Eton Mess Cake
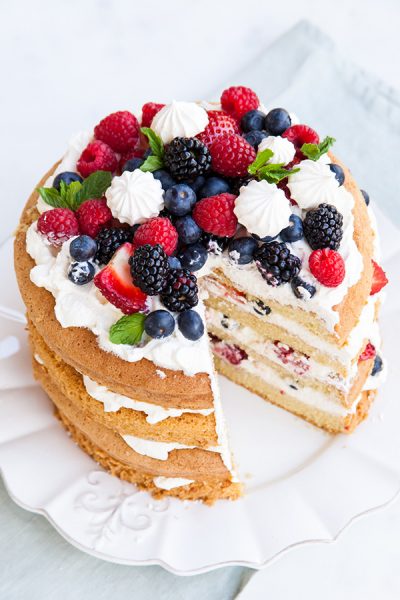
Inspired by the classic dessert, this Eaton Mess Cake combines crisp meringues, sweetened cream, fresh berries - layered between a light and airy sponge cake.Inspired by the classic dessert, this Eaton Mess Cake combines crisp meringues, sweetened cream, fresh berries - layered between a light and airy sponge cake.Inspired by the classic dessert, this Eaton Mess Cake combines crisp meringues, sweetened cream, fresh berries - layered between a light and airy sponge cake. Eton Mess Cake - ... Continue Reading
Sugar’s Impact on Cake
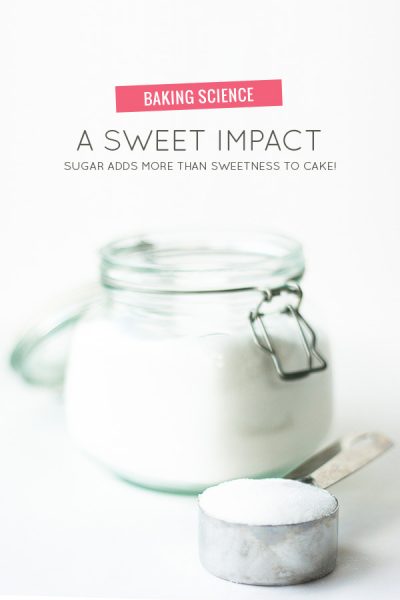
Our contributor, Summer Stone of Cake Paper Party, is back today with a new baking science experiment.... Sugar plays an important role in any cake recipe. Without the inclusion of sugar, a cake would be bland and uninspired in relation to flavor, but did you know that your cake would also be pale in color, squatty and dense? Sugar’s effects on cake are quite diverse. To really get a feel for the importance of sugar in a recipe, I baked cakes with anywhere from no sugar at all to one and ... Continue Reading
Raspberry Champagne Cake
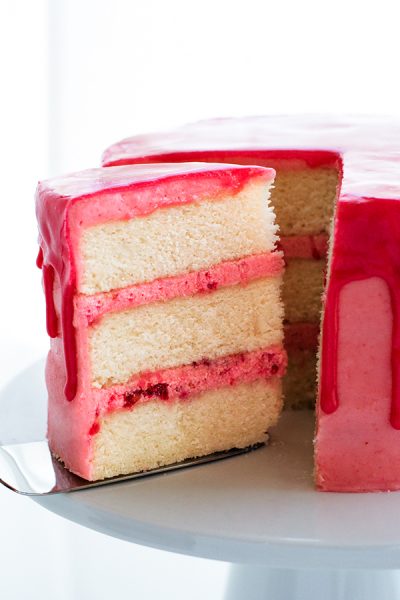
Raspberry Champagne Cake - champagne infused cake with raspberry champagne buttercream, raspberry drip glaze, fresh raspberries and whipped cream. A new layer cake recipe perfect for Valentine's Day! Nothing says I love you like a homemade cake. Except maybe a fabulous homemade cake with champagne, berries and cream, topped with a drippy pink glaze. Whether you've found the love of your life or are celebrating February 14th with your best gal pals, today's recipe has Valentine's ... Continue Reading
You’re A Gem Cake
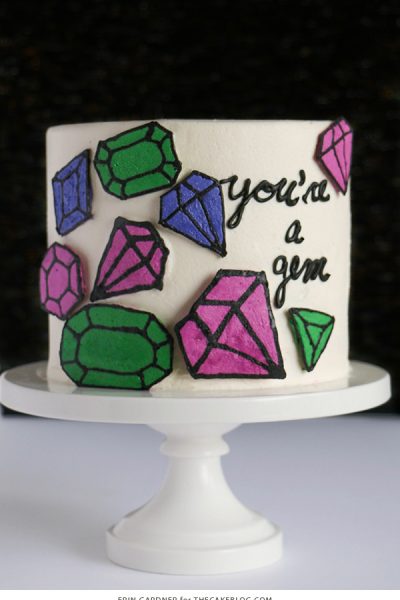
Our contributor, Erin Gardner of Erin Bakes, is back with a new tutorial today! If hearts and roses aren’t your thing, then this is the Valentine’s Day cake for you! Bright, bold, buttercream jewels help convey the message that your lovey is a real gem. It’s a sweet sentiment perfect for your partner, bff, or the little ones in your life. This frozen buttercream transfer is an easy way to add detail to a design without the pressure of piping directly onto the cake, especially when we're ... Continue Reading
- « Previous Page
- 1
- …
- 4
- 5
- 6
- 7
- 8
- …
- 13
- Next Page »
