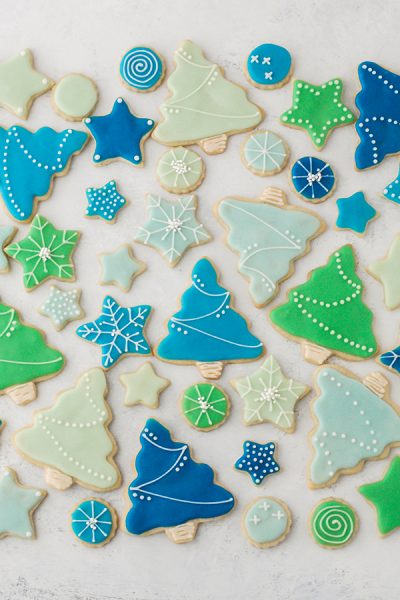
Decorated Sugar Cookies - vanilla bean sugar cookies with a simple glaze icing for easy yet thoughtful gift giving. A holiday sugar cookie recipe, sponsored by Bob's Red Mill as part of their Made with Love, Baked with Bob's campaign. I know 99% of our posts are focused on cakes or cupcakes, but did you know that my love of baking actually started with cookies? My very first memories of baking were created in my grandmother's kitchen, helping her make cookies. Even though I was young, ... Continue Reading
Search Results for: cupcakes
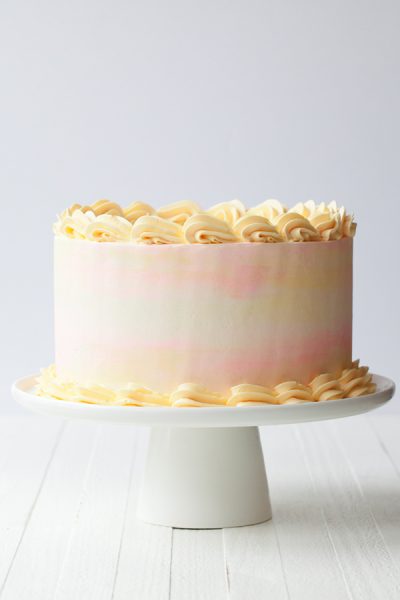
Winter Buttercream Greenery
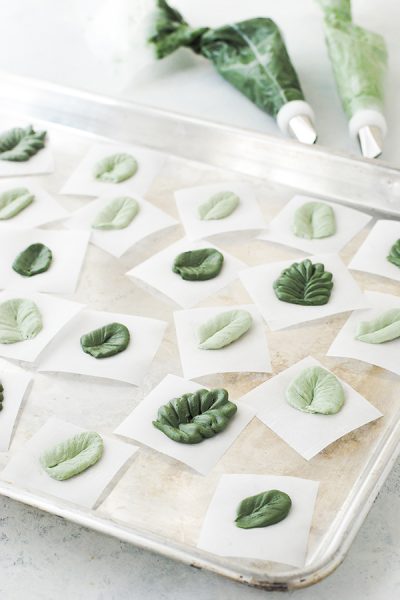
Winter Buttercream Greenery - how to pipe buttercream leaves, branches, pine and seasonal greenery fit for a wintry holiday cake. A new video tutorial! Today I'm showing you how to create the wintry buttercream decorations from this Eggnog Cake that I shared earlier in the week. Your response to the buttercream flowers on my Pumpkin Spice Cake inspired me to do something similar with this cake, only tweaked for the winter holidays. I love the look of fresh greenery mixed with wood toned ... Continue Reading
Chocolate Lollipop Ghosts

Chocolate Lollipop Ghosts - how to make edible lollipop ghosts for Halloween cakes and cupcakes using white chocolate and suckers. A new tutorial by our contributor Erin Gardner. Can you guess the source of inspiration for these hauntingly delicious lollipop ghosts? If you’ve ever trick-or-treated, odds are you’ve received a tissue or napkin-covered lollipop ghost at least once in your travels. Better odds, you probably got at least a few every year! This updated and completely edible ... Continue Reading
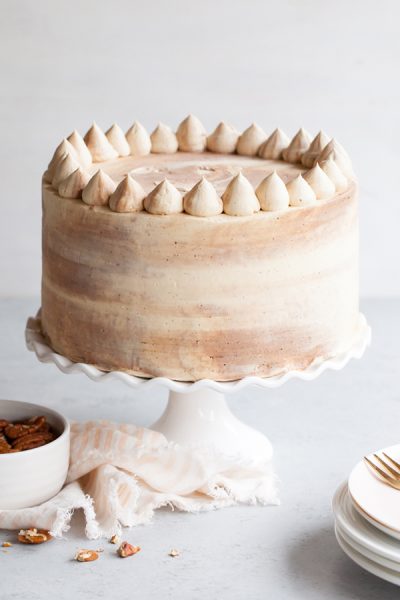
Pumpkin Spice Cake
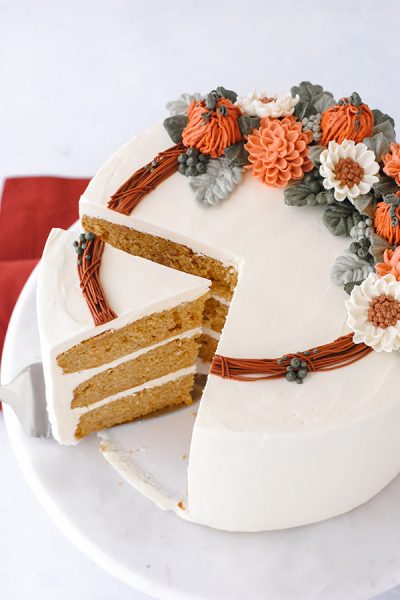
Pumpkin Spice Cake - moist pumpkin cake with subtle hints of cinnamon, ginger and nutmeg paired with pumpkin spice buttercream frosting. A fall cake recipe, sponsored by Promised Land Dairy for their #FarFromOrdinaryMilk campaign. Believe it or not, I'm writing today's post old school style -- like before laptops and tablets, old school style. Perched outside, I'm soaking up the evening twilight and savoring the crisp autumn breeze. Off in the distance, the sounds of happy children on a ... Continue Reading
Salted Caramel Pear Cake
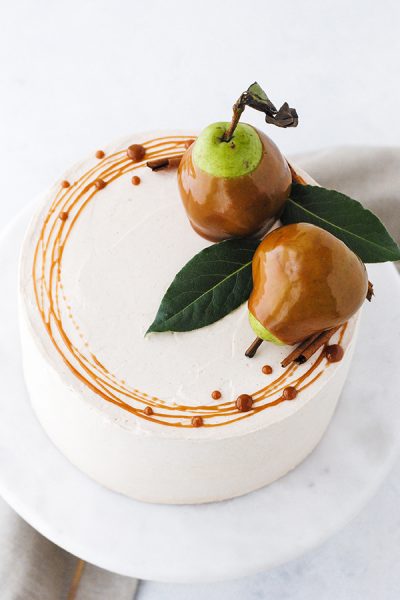
Salted Caramel Pear Cake - fresh pear cake with cinnamon buttercream, salted caramel and homemade caramel dipped pears. The calendar might not agree, but it feels like fall has arrived. The weather is cool, crisp and as I look outside, I can easily spot the first few leaves that are starting to turn on our towering oak tree in the back. This is by far my favorite time of year. Why? I honestly cannot say for certain. Maybe it's because autumn signals the return to normal routines around ... Continue Reading
Hummingbird Cake
Hummingbird Cake - a no fuss favorite with tropical flavors of pineapple, banana and pecans making it the perfect summer bake. A new layer cake recipe by our contributor, Tessa Huff. At the height of summer, nobody wants to turn their oven on. But if you must, let’s make a vow that it will be for a good reason. A tasty reason. If your kitchen is anything like mine, then you know that when the oven is on, it heats up to 10-degrees warmer than the rest of the house. You also know that the ... Continue Reading
10 Fabulous Flamingo Treats
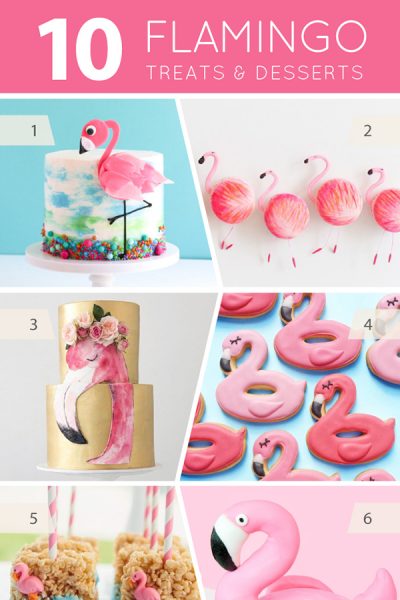
Flamingos, flamingos, everywhere. While this pretty pink bird enjoys an extended moment in the spotlight, first stealing our hearts two summers ago, it seems as though their staying power is almost as majestic as their whimsical legs and billowing feathers. And we simply can't help but bask in all the colorful summer vibes. Pink, tropical with a nod to retro, seriously what's not to love? So today we're taking a look at some of our favorite flamingo sweets. From flamingo cakes to flamingo ... Continue Reading
10 Ice Cream Inspired Cakes
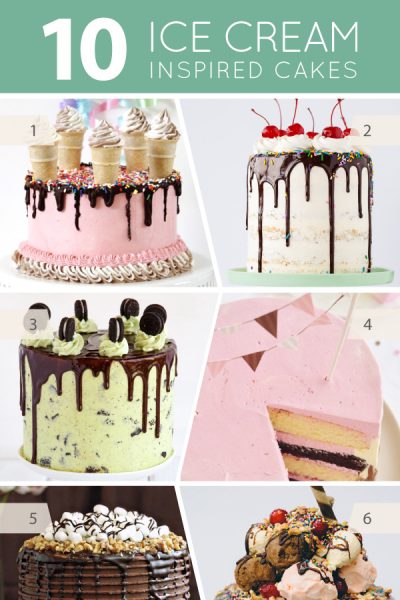
Today is National Ice Cream Day! If there's one thing we love as much as cake around here, it's ice cream! Because cake and ice cream are the perfect pair and were destined to be together. So I thought we'd celebrate this ice cream holiday with a little nod to the ultimate power couple. Today we're taking a look at some of our favorite ice cream inspired layer cakes. While you won't find any actual ice cream in these babies, you will find classic ice cream flavors baked into fluffy cake layers ... Continue Reading
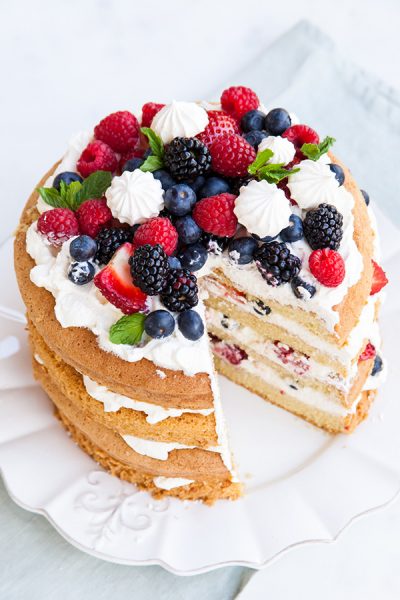
10 Strawberry Desserts to Bake
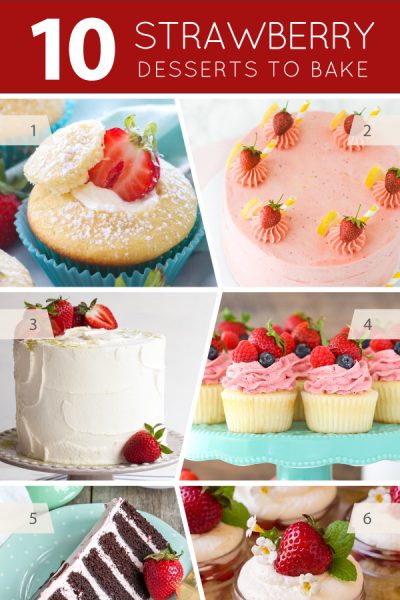
If you've been counting down the days until local strawberries start to arrive in your market, your wait is over. Berry season is finally here! We kicked the season off with our third annual strawberry picking trip and now I simply can't shake the pink-hued strawberry dreams that keep popping to mind. Now is the time to overindulge in baskets upon baskets of fresh strawberries. Red, delicious and ripe - in season strawberries just taste like summer. Their sweet yet tart bite conjures up ... Continue Reading
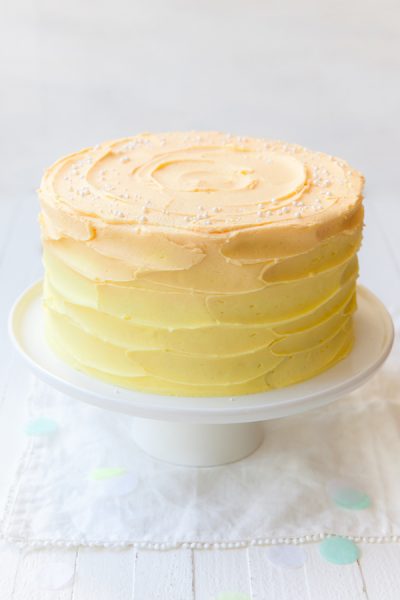
Strawberry Lemonade Cake
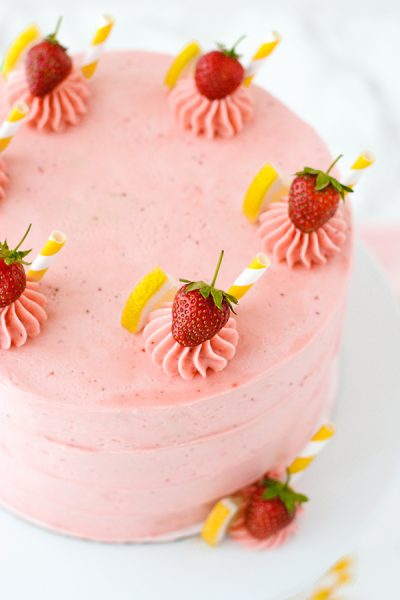
Strawberry Lemonade Cake. A tender layer cake recipe brightened with lemon juice, lemon zest and fresh strawberries, frosted with a tangy sweet fresh strawberry buttercream frosting. Last summer I shared my favorite Lemon Blueberry Cake and while it's always been a hit in our house, it quickly became a reader favorite too. So many of you have given it a try and left your feedback. Thank you! Turns out, one of the most commonly asked questions on this recipe is about subbing ... Continue Reading
Strawberry Picking
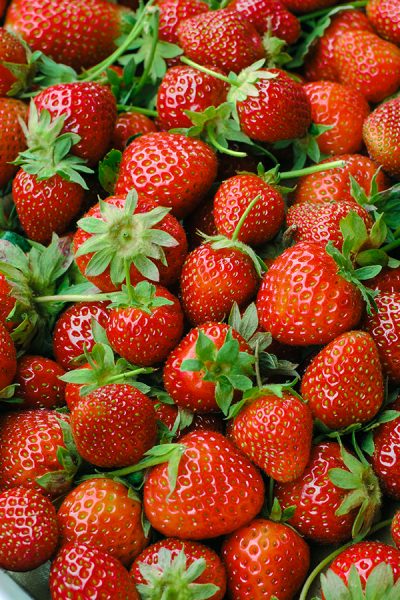
Last weekend my family had the chance to go strawberry picking. Have you ever been? This is our third year to drive out to the same little farm and spend the morning picking fresh berries. It has become a family tradition of sorts, something we look forward to each year. With a sack lunch in tow and a camera around my neck, we make an event out of it. My daughter endlessly searches for the most delectable berries, bright red and juicy, while my husband kindly obliges as I take way too many ... Continue Reading
Fourth of July
EATON MESS CAKE BERRIES AND CREAM CUPCAKES FIREWORKS CAKE RED WHITE & BLUE DESSERTS LEMON BLUEBERRY CAKE PATRIOTIC PINWHEELS STRAWBERRY SWIRL CAKE CHEESECAKE SHOTS STRAWBERRY PICKING VINTAGE PATRIOTIC CAKE LEMON BLUEBERRY CUPCAKES PINWHEEL COOKIES COOKIE DOUGH ICE CREAM SAMMY STRAWBERRY THYME CAKE AMERICANA QUILT CAKE RED WHITE & BLUE STRAWBERRY MATCHA CAKE ROASTED BLUEBERRY ... Continue Reading
10 Watermelon Treats
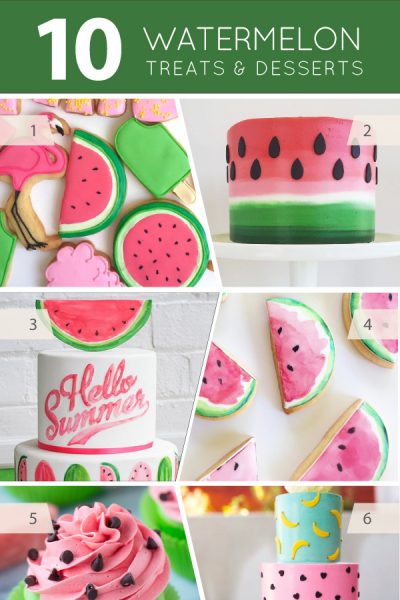
Watermelon has been on trend for several years now, with our first loves popping up back in 2014. Three years can be an eternity when it comes to trends and the internet. Is it possible that watermelon's heyday is over? Possibly. But once you get a look at today's post, I have a feeling you'll agree with me. Watermelon is just as fresh and juicy as ever. Its shades of pink and red with that strong pop of green are vibrant, refreshing and absolutely perfect for summer! With everything from an ... Continue Reading
Lemon Honey Apricot Cake
Lemon Honey Apricot Cake - lemon cake paired with honey buttercream and apricot jam filling to create a flavor palette that's bright, fresh and slightly floral. A new layer cake recipe by our contributor, Tessa Huff. While we wait in anticipation for longer days and sunnier skies, aka summer – aka berry season, I wanted to create a cake to withstand all the seasons. Robust, cinnamon-scented, and decadent desserts warm our souls in the fall once all the strawberries have been picked and ... Continue Reading
Mother’s Day Gallery

ROSE CAKE POPS CHAMPAGNE MIMOSA CAKE 10 TREATS FOR MOM CHOCOLATE WRAPPED CAKE NESTING DOLL CAKE WATERCOLOR CAKE CHOCOLATE RASPBERRY CAKE STENCIL PAINTED ROSE RASPBERRY BLOOD ORANGE BAKING SUPERPOWER PRINTABLE LONDON FOG CAKE 10 MOTHER'S DAY GIFTS ... Continue Reading
Father’s Day Gallery
CHOCOLATE BOURBON PECAN TV DINNER CAKE CARAMEL CAPPUCCINO CAKE WALNUT CAKE DRIPPY CHOCOLATE CAKE COOKIE DOUGH ICE CREAM SAMMY CARAMEL BOURBON CUPCAKES CHOCOLATE CHIP COOKIE CAKE SWEET POTATO CAKE CHOCOLATE TURTLE CUPCAKES BAKING WITH ALCOHOL CHOCOLATE TRUFFLE CAKE S'MORES CAKE BUTTERFINGER CUPCAKES CHOCOLATE TURTLE CAKE CHOCOLATE HONEYCOMB COFFEE WALNUT CAKE CHOCO BANANA ... Continue Reading
Summer Gallery
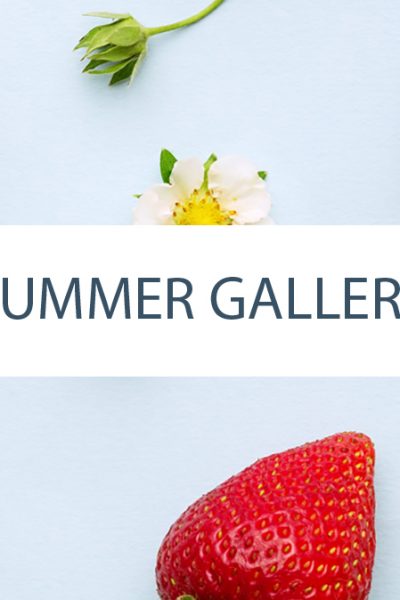
TEQUILA SUNRISE CUPCAKES FLAMINGO CAKE LEMON BLUEBERRY CAKE STRAWBERRY LEMONADE CAKE S'MORES CAKE LEMON POPPY SEED CAKE KEY LIME CUPCAKES 10 FLAMINGO TREATS HONEY CUPCAKES GIANT DONUT CAKE CREME BRULEE CAKE FLAMINGO CAKE STRAWBERRY NUTELLA EATON MESS CAKE 10 SUMMER CUPCAKES CHERRY CHIP CAKE 10 ICE CREAM CAKES LEMON BLUEBERRY CUPCAKES LEMON LAVENDER ... Continue Reading
Coconut Cake
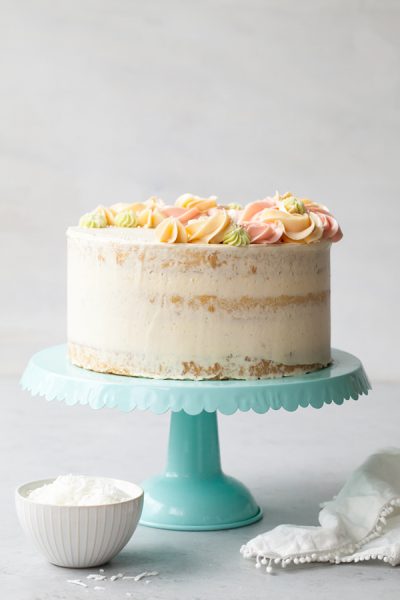
Coconut Cake - homemade coconut cake with creamy coconut milk, brushed with coconut syrup to keep it extra moist, and topped with vanilla bean buttercream frosting. A new layer cake recipe by our contributor, Tessa Huff. It seems like spring is full of mini milestones leading up to summer. We’ve just had Day Light Savings, Pi(e) day and St. Patrick’s Day, and we now gearing up for Easter and Mother’s Day. Perhaps spring is packed with all of these holidays to help get us through the ... Continue Reading
Marbled Chocolate Easter Eggs
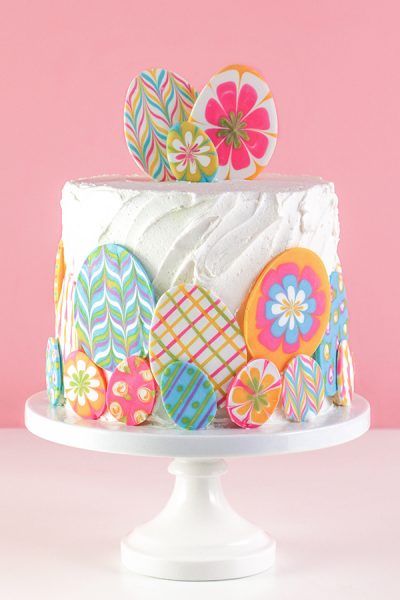
Marbled Chocolate Easter Eggs - how to make marbled Easter egg toppers for cakes and cupcakes using chocolate coating and cookie cutters. A new tutorial by our contributor Erin Gardner. These marbled chocolate Easter eggs are a fun, easy, and delicious way to dress up a cake or cupcakes for your holiday brunch table. They look so impressive, but are way easier and faster to make than they appear. Don’t worry about having a steady piping hand! Anything wonky or wobbly will be smoothed ... Continue Reading
Blackberry Lime Cake
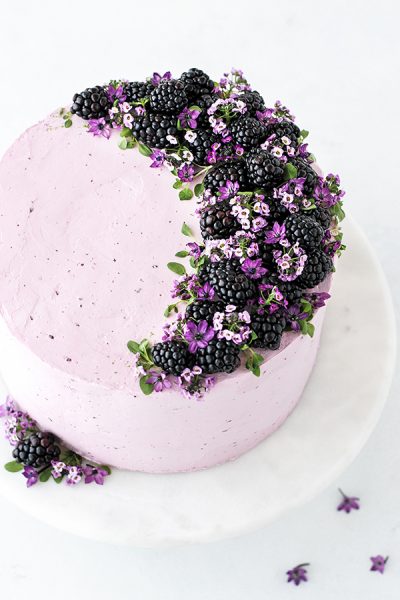
Blackberry Lime Cake - tender cake infused with lime zest, frosted with blackberry buttercream, topped with fresh blackberries and edible flowers. Spring is officially here. While our local weather has been up, down and everywhere in between, my heart is ready for birds chirping, green buds of new growth on the trees and blooms of color. Mother Nature might be slow to cooperate, but this is the time of year to embrace color, in all of its pastel glory. From Easter and Mother's Day to ... Continue Reading
10 Magical Unicorn Treats
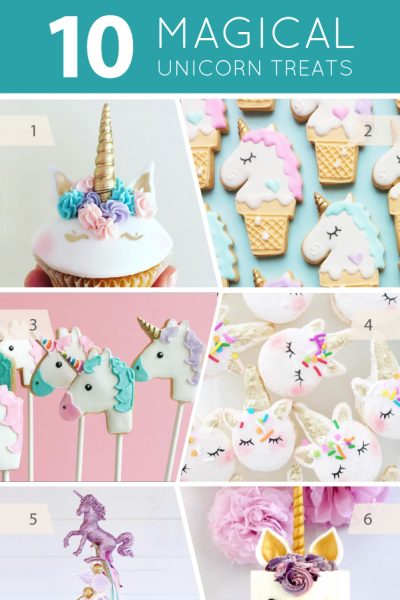
Unicorn themed desserts have ruled my Instagram feed since last summer and it's about time we showed them some love here on the blog. Whether you're planning a birthday party or just looking for a pastel rainbow treat to brighten your day, there's nothing as captivating as a unicorn. From unicorn cakes and unicorn cookies to unicorn donuts and cake pops too! Yet we mustn't overlook the unicorn macarons, hot chocolate, popcorn, chocolate bark and piñatas either. From one end of the rainbow to the ... Continue Reading
Mod Polka Dot Cake
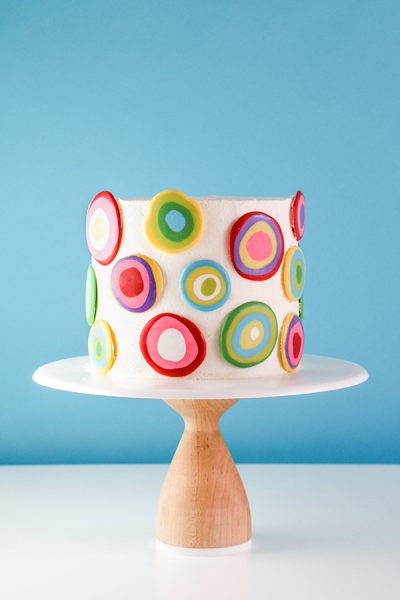
Mod Polka Dot Cake - how to make colorful polka dot toppers for cakes and cupcakes using chocolate candy coating. A new tutorial by our contributor Erin Gardner. These bright and cheery mod dots are sure to bring a smile to anyone’s face! They’re a fun, simple, and delicious way to bring color and design to any cake in any season. I went with a cool combination of spring brights, but this design would work with any color palette. ... Continue Reading
Cherry Chip Cake
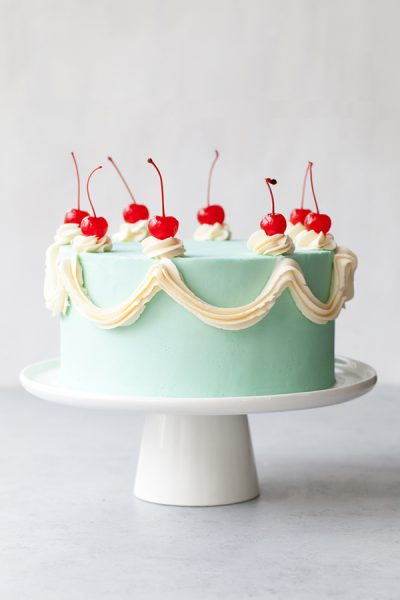
Cherry Chip Cake - homemade maraschino cherry cake studded with chocolate chips, layered with chocolate ganache and finished with a whipped vanilla buttercream frosting. A new layer cake recipe by our contributor, Tessa Huff. This cake is bright, playful and full of whimsy. I first had visions of this cake a whole year ago, but between holidays and seasonal favorites, it’s been difficult to fit it in. Now that Valentine’s Day has passed and we are waiting for spring/summer produce (hello ... Continue Reading
Chocolate Truffle Cake

Chocolate Truffle Cake - a chocolate layer cake recipe with dense, moist chocolate cake, silky chocolate truffle frosting and chocolate flakes. By our contributor, Olivia Bogacki. I am a HUGE fan of chocolate, especially chocolate cake - there are few things more comforting. I always have some kind of chocolate around the house. I know, I’m a baker so it’s obvious. But I’m talking about chocolate other than what I use for baking. I’m talking about little pieces I can snag here and there ... Continue Reading
Valentine’s Day Gift Guide
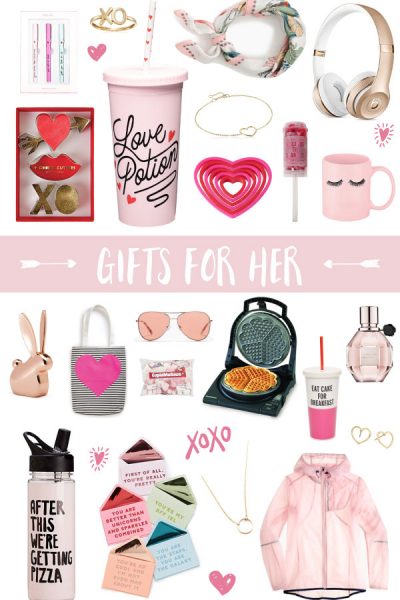
Valentine's Day is quickly approaching and it feels like we just wrapped the December holiday season. When it comes to Valentines gifts - some go big, some go small, some don't go at all. If you're in favor of gifts, it can be a challenge to come up with that something special after just exhausting all of your gift ideas for loved ones back in December. So I wanted to share some ideas to help spread the love around this year - I think we could all use a little more love right now, don't you? ... Continue Reading
Marble Chocolate Hearts
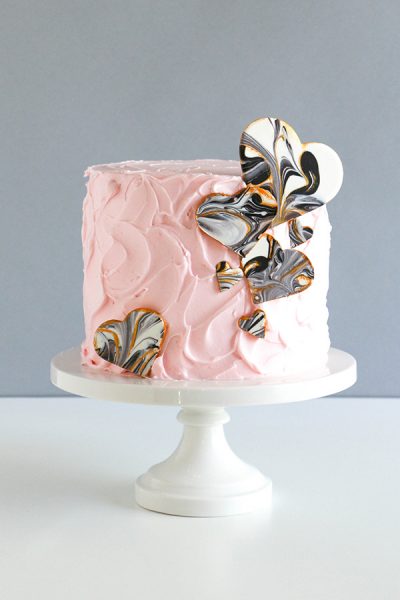
Marble Chocolate Hearts - how to make marbled heart toppers for cakes and cupcakes using chocolate coating and cookie cutters. A new tutorial by our contributor Erin Gardner. Make simple and chic marbled chocolate hearts to dress up a Valentine’s Day cake, a modern Mother’s day cake, or for any other occasion that calls for cuteness! What better way to show someone just how much you *heart* them than to shower them with hearts that are as beautiful as they are delicious. Trends come ... Continue Reading
- « Previous Page
- 1
- …
- 3
- 4
- 5
- 6
- 7
- …
- 13
- Next Page »
