
Our contributor, Tessa Huff, is back with a new cake recipe perfect for fall…. I don't know about everyone else, but from where I write and bake, the seasons are already subtly changing. Even though I do not have to return to school or anything, I can sense a shift in energy around the city. Soon it will be darker earlier, the tourists absent from the city center, and I'll need a scarf at the beach. However, as sad as it always is to see another beautiful summer come to a close, I do love ... Continue Reading
Search Results for: ice cream
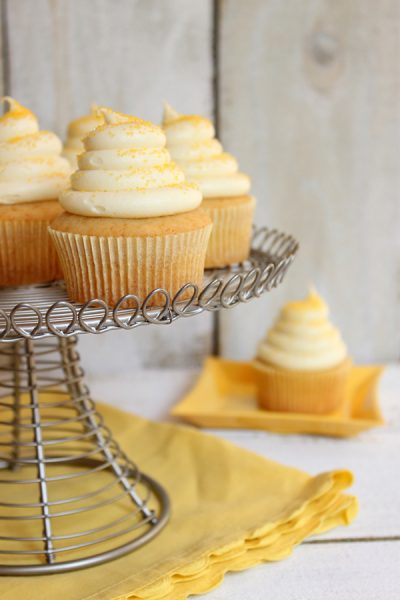
Creamsicle Cupcakes

Our contributor, Lauren Kapeluck of EllenJay Events, is back with a delicious new recipe.... It might only be May but the ice cream man has been driving down my street for well over a month now. Every time I hear his musical truck all I can think about are drumsticks, ice cream sandwiches and popsicles. It reminds me that the warm weather is here to stay and it's time to start stocking my freezer full of cool summer treats! So thank you Mr. Ice Cream Man for inspiring me to create these ... Continue Reading
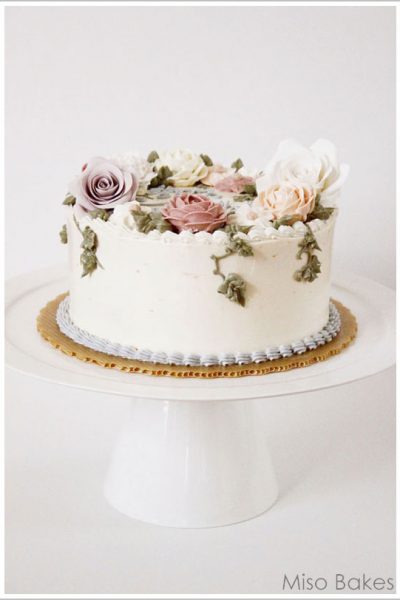
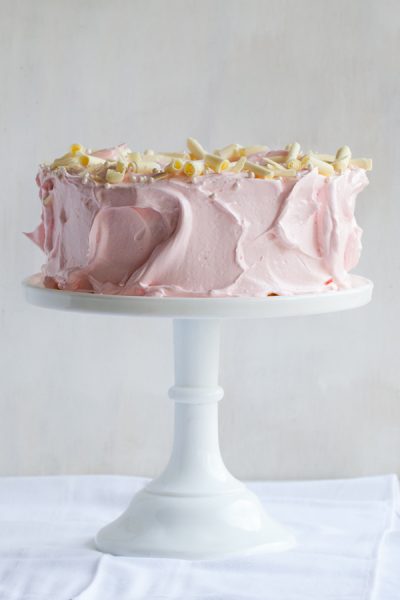
Soft Yellow and Creamy White Florals
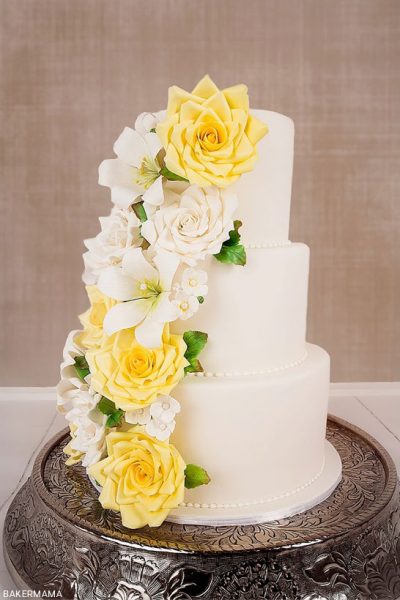
Today's cake is a little slice of summer heaven. Served up with a big bouquet of beautiful flowers and a style perfectly suited for 2013 wedding season. Every sweet petal, every tiny blossom, every intricate leaf. With soft yellows and creamy whites, this design is just down right gorgeous. I'm talking crazy gorgeous! And it comes to us from a baker who stole our hearts last year with her adorable Elephant 1st Birthday and this glamorous pink and black cake. So needless to say, we're ... Continue Reading
Spiced Chocolate & Churros Cake
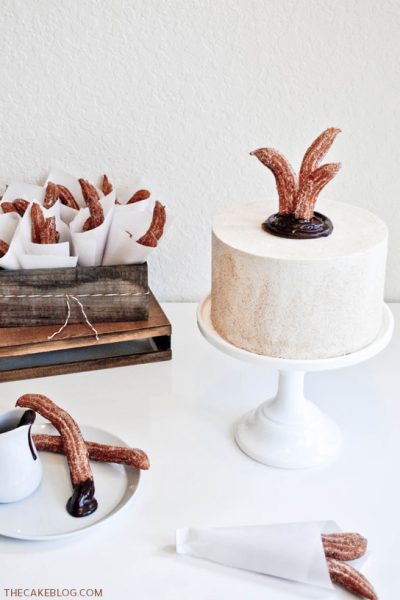
If you caught my vanilla cake recipe post last week, you may remember that I was feeling a little vanilla about vanilla. After all these years, my love affair with vanilla cake had grown tired and stale. Just like any relationship going through a rough patch, we needed to zest things up a bit! So I put everything on hold and spent some serious quality time with this recipe. And I'm happy to report that today is a new day for vanilla cake. One that is fresh, bright and oh-so-delicious. Even ... Continue Reading
Recipe: Banana & Cream Cheese Cupcakes
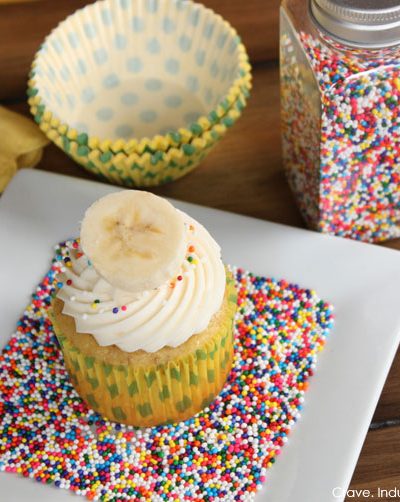
Our contributor, Lauren of Crave. Indulge. Satisfy., is back with a delicious new recipe.... Spring is almost here, hooray! I am so excited it's March for several reasons, warmer weather is near and my little guy will be ONE at the end of the month! I am in full party planning mode for his birthday and I thought it would be fun to create a cupcake this month using one of his all time favorite foods, bananas! Our fruit bowl is overflowing with bananas these days and it seems we can never eat ... Continue Reading
Purple Ombre Buttercream Cake
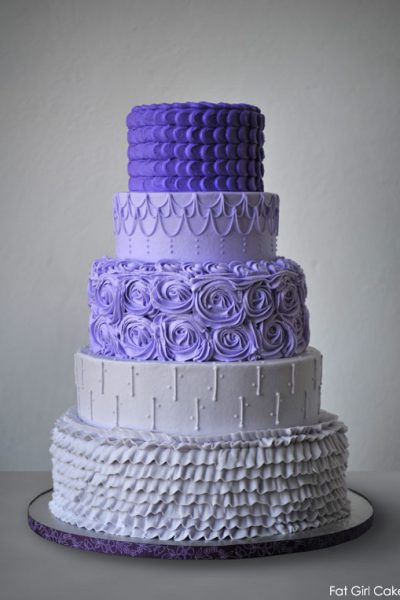
Buttercream. Buttercream. Glorious Buttercream. Today's cake is all about the buttercream. Ruffles, roses, petals, swags, swirls and dots. This cake includes just about every popular buttercream technique from today's cake scene. Armed with shades of purple and a piping bag, Kristin Kirkpatrick , owner of Fat Girl Cakes in Virginia, proves that buttercream can be just as fabulous as fondant. Each tier of today's cake boasts a different piping style, giving buttercream lovers something to ... Continue Reading
Pumpkin Spice Latte Cake
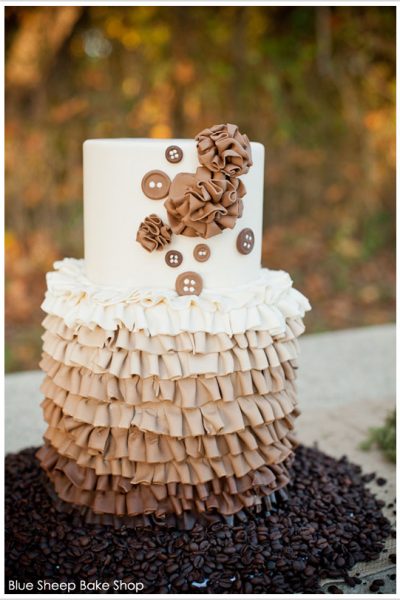
How do you know when the holidays are upon us? The change in temperature outside? The hustle and bustle? Or the pumpkin spice lattes popping up at all of your favorite coffee shops?! Today's cake celebrates the feeling of fall with it's seasonal latte-inspired goodness! Layers upon layers of ruffles fade from a deep espresso to a creamy ivory. Surrounded by an abundance of beans and oodles of autumn pretties, this entire table has me craving coffee and cake! What a perfect way start to ... Continue Reading
Candy Fruit Slice Cakes
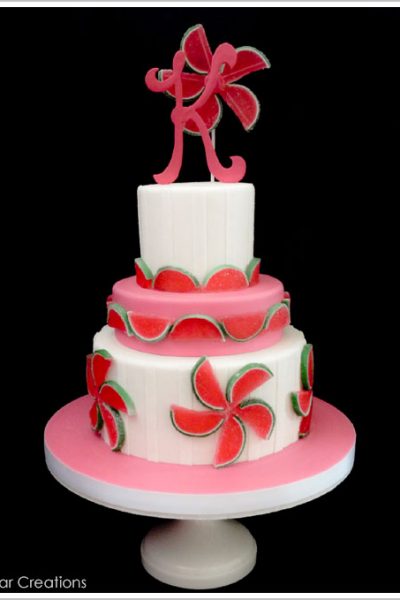
Today's cakes feature a fabulously fun idea that I know you are going to love! With a fresh and fruity twist, these cakes are perfect for summer fun! Candy fruit slices become the star in these whimsical designs by Rebecca Sutterby, owner of Sugar Creations in Kansas. One design is all about lemon while the other is pink, green and perfectly watermelon. Both are ridiculously cute, not to mention incredibly creative! So let's enjoy the sweet taste of summer with these delightful Candy Fruit ... Continue Reading
Sweet Snippets: Using Leftover Buttercream
Our contributor, Miso of Miso Bakes, is sharing some helpful tips to put extra buttercream to good use. Enjoy.... Don't you hate it when you have awkward amounts of tinted buttercream left over? Most always it's a tad too much to toss, but not enough to store in a tub. So, what do I do? I plop the buttercream onto a piece of plastic wrap, tightly fold the saran wrap into a small purse, date it, and place it in one huge freezer zip bag along with the other 'awkwards' until ready to ... Continue Reading
Honey Cupcakes with Honey Cream Cheese
Honey Cupcakes with Honey Cream Cheese Frosting - a delicious cupcake recipe, made from scratch, with local wild flower honey. Created by our contributor, Lauren Kapeluck of EllenJay Events. Hello friends. It's Lauren from EllenJay Events. I want to start off first by thanking Carrie for asking me to be a part of her amazingly gorgeous and always inspiring cake blog! I am honored to be a new contributor on The Cake Blog and look forward to sharing many great cupcake recipes and ... Continue Reading
Real Party: Peaches and Cream Birthday
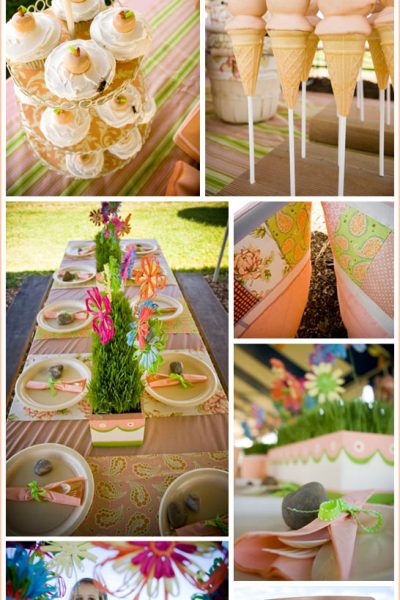
I am very excited about today's real party! It comes to us from the talented mom, sewer, crafter, and designer, Jessica Levitt. You may remember Jessica from the Construction Birthday Party we featured back in December, which was amazingly cute. Well today I'm thrilled to share the fantastic party she threw for her daughter's 5th birthday. Put together the charming peach farm location and her daughter's love of ice cream... you've got yourself some peach picking and ice cream licking fun. ... Continue Reading
Pumpkin Chocolate Chip Cupcakes
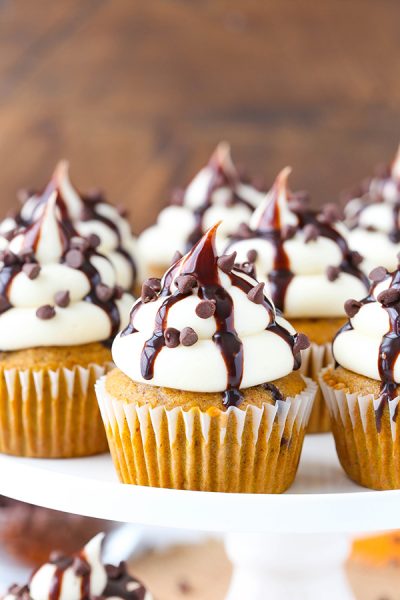
Pumpkin Chocolate Chip Cupcakes - pumpkin cupcakes studded with chocolate chips, topped with cream cheese frosting and chocolate sauce. This recipe is the perfect way to cure your pumpkin cravings this fall! Created by our contributor, Lindsay Conchar. I don't know about you, but as soon as summer starts winding down I get excited about pumpkin season. I'm pretty sure I let out a little squeal of excitement when I saw pumpkin spice coffee in the grocery store the other day. My kitchen ... Continue Reading
Pink Peppermint Cake
Our contributor, Tessa Huff, is sharing a new cake recipe today... There is nothing quite like experiencing the holidays through the eyes of a child. All the wonder and excitement in their hearts keep this time of year extra magical. And while this is my first holiday season having a little one of my own at home, I've tried to take notes from my nieces and nephews over the years on how to slow down, stress less, and really try to enjoy all the celebration. This cake is for them ... Continue Reading
GLUTEN-FREE CHOCOLATE CHIP COOKIES
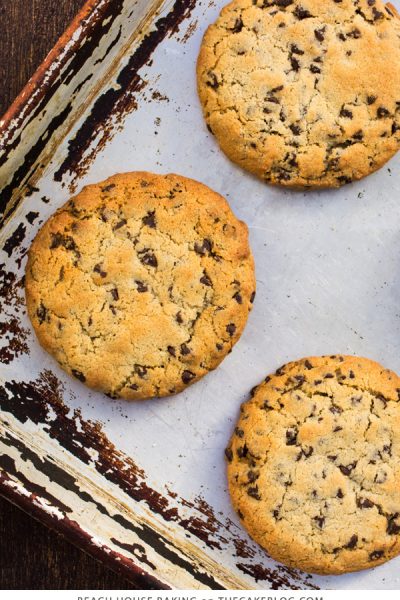
Who doesn't love a good chocolate chip cookie? It's a timeless treat that almost everyone can agree upon! Around here, we never tire of new spins on this classic recipe. Milk chocolate or dark chocolate, flat and crispy or soft and chewy.... we're up for anything chocolate chip cookie related. To include today's featured recipe -- a gluten-free variation that looks just as tempting as the original. These perfectly large cookies, with golden brown edges and an abundance of chocolate chips, ... Continue Reading
Root Beer Float Cupcakes
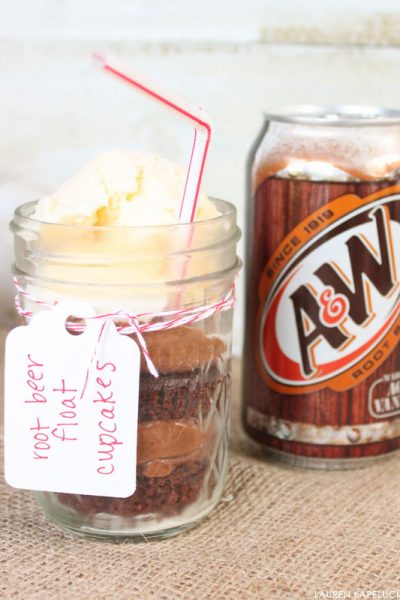
Our contributor, Lauren Kapeluck of EllenJay Events, is back with a delicious new recipe.... With the temperatures getting hotter and summer quickly approaching I thought it would be fun to reminisce back to my childhood with this month's cupcake recipe. I have never been much of a soda drinker but on those rare occasions when I do indulge, my beverage of choice is Root Beer, probably because of the intense sugary vanilla flavor. As a kid, my favorite cold treat was a Root Beer Float. ... Continue Reading
Sparkling Christmas Trees
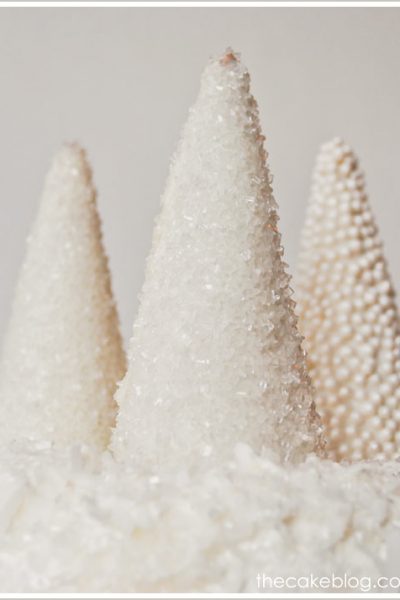
Okay, so I know I'm not the only one who isn't quite ready for Christmas. If you're still getting your goodies and sweets together, I have one last DIY project for you today. It's incredibly easy and quick but with impressive results. I did this project from start to finish {including photos and clean up} during nap time on Sunday. So when I say quick, I mean quick! Ice cream cones get a coating of shimmering, sanding sugar and... Voilà! Sparkling Christmas Trees! An elegant decoration ... Continue Reading
Real Party: Neapolitan Birthday
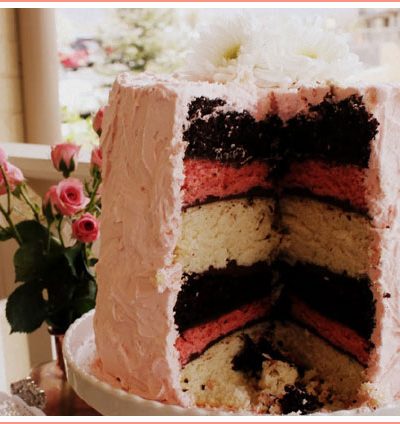
Today's Real Party is an intimate birthday party with vintage charm. Created by Lisa of Moore Minutes for her mother's birthday, this sweet little event includes feminine details and soft colors. A small group of close friends gathered at a Victorian coffee house for girl talk, coffee and sweets. How perfect does that sound? From the doilies, lace and roses to the six layer cake, cookies and ice cream... you will fall in love with this vintage Neapolitan Birthday Party. {A few thoughts ... Continue Reading
St. Patrick Day Desserts
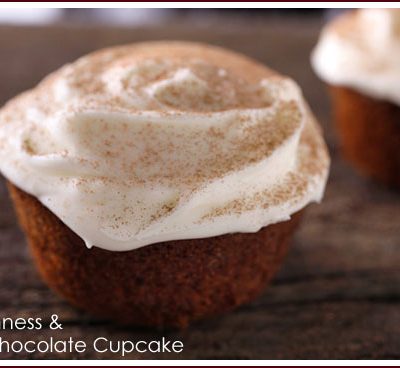
Top 'o the morning to you! I hope you have your green on because you won't find any here today. Crazy, I know! Instead of featuring traditional green St. Patrick's Day recipes, I thought we'd take a look at a few new ways to celebrate. These Guinness inspired recipes from Chow.com are a fun way to get your Irish fix for the day. Pairing the traditional Irish stout, Guinness, with chocolate is a great combination. So why not try cooking with these two ingredients? Whether it's in the form ... Continue Reading
Real Party: Retro Milkshake Bar
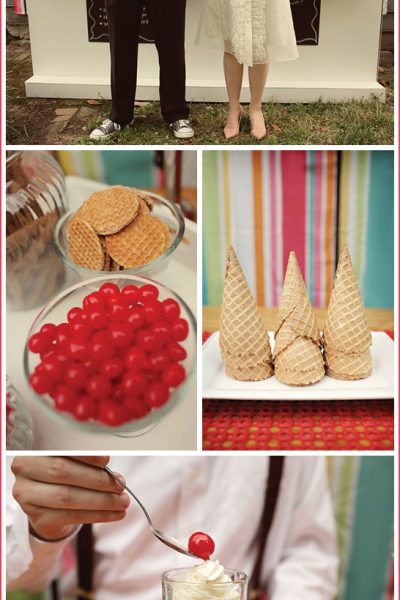
Today's party is one after my own heart. My family knows all too well that ice cream is my all time favorite treat. You'd probably think it would be cake, but no - it's ice cream. So when I spotted this Retro Milkshake Party over on Elizabeth Anne Designs, I was instantly in love. This stunning party layout, created by Kellie Kano and Elissa Keno, would be perfect for a summer wedding or a child's birthday party. Big kids and little kids agree, we all scream for ice cream! From the ... Continue Reading
Chocolate Fireworks Cake
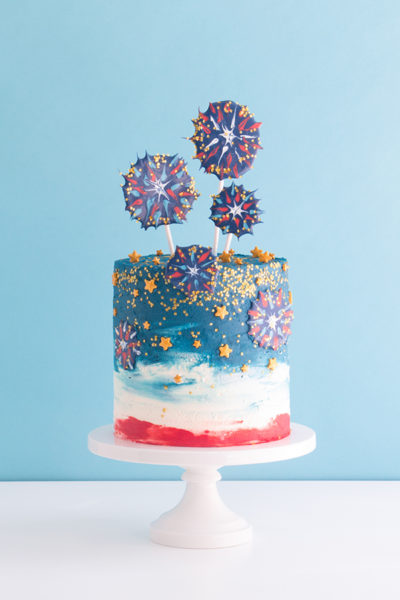
Chocolate Fireworks Cake - how to make red, white and blue fireworks out of chocolate for a patriotic 4th of July cake. A new cake tutorial by our contributor, Erin Gardner. I’m typically a believer that Independence Day cakes should be super easy, super delicious, and loads of fun to make. It is a day off for most, after all. The bursting, chocolate fireworks on this cake may look like they violate this rule, but trust me, they check all the boxes! If you’ve been sitting on ... Continue Reading
Caramel Apple Decorated Cookies

Caramel Apple Cookies - how to decorate caramel apple cookies. A fall sugar cookie tutorial created by our contributors, ellenJAY. Once the air turns crisp we know fall is on our doorstep and apple season is finally here! And when we think of apples we can't help but dream of apple pie, homemade apple donuts, comforting warm apple cakes straight out of the oven with a huge scoop of ice cream and of course, caramel apples! Our caramel apple cookies are the perfect treat for fall ... Continue Reading
10 Football Party Desserts
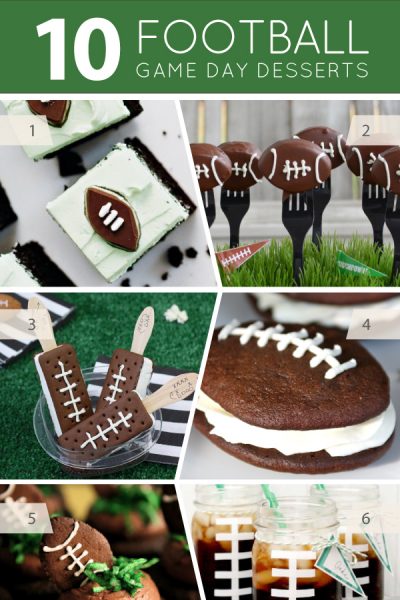
Football season is officially here! And I, for one, could not be more excited! In my house, we're big fans of college football and everything that goes with it. The rivalries, the tailgating, the fanatical superstitions that seem crazy (unless of course, they work) and the general excitement that comes when your team dominates. It's one of the best parts of fall and this past weekend we dove right back in. Now, I know not everyone is a fan of football. But you have to admit that any ... Continue Reading
Hamburger & Hot Dog Cookies
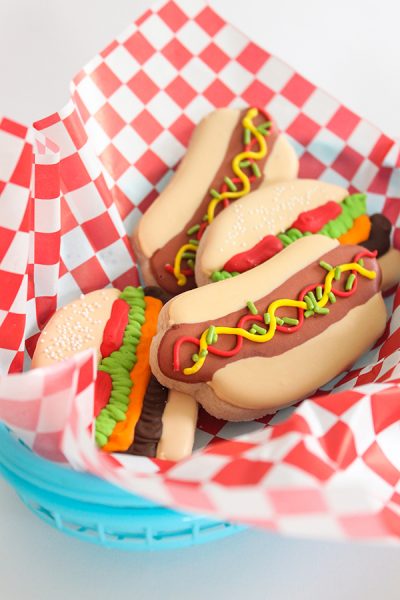
Hamburger & Hot Dog Cookies - how to make adorable hamburger and hot dog cookies. So fun for parties and BBQs! A sugar cookie decorating tutorial created by our contributors, ellenJAY. With the holiday weekend approaching, it's time to fire up the grill! There’s nothing better than having an outdoor BBQ on a hot summer night with friends and family in the back yard. And of course our go to favorites to throw on the grill are hamburgers for the adults and hot dogs for the kiddos! ... Continue Reading
Caramel Mocha Cupcakes
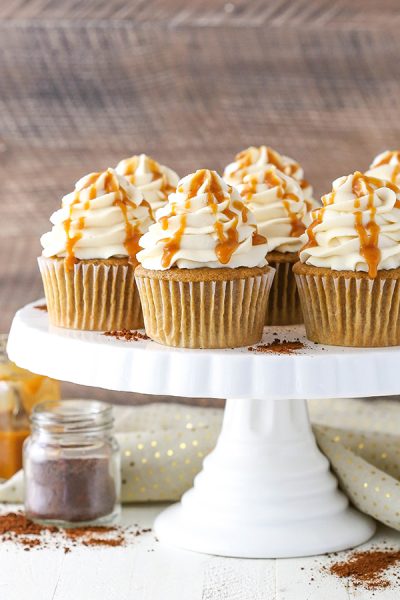
These Caramel Mocha Cupcakes are made with a coffee flavored cupcake, caramel frosting and caramel drizzled on top! A coffee favorite in dessert form! A new cupcake recipe by our contributor, Lindsay Conchar. Believe it or not, I wasn’t always a coffee fan. It took years for me to develop a taste for it. I started off drinking Caramel Frappuccino’s at Starbucks because – let’s face it – it’s basically coffee and caramel flavored ice cream. ☺ After drinking enough of those, I ... Continue Reading
Butter Pecan Cupcakes

These Butter Pecan Cupcakes are made with a moist vanilla cupcake studded with plenty of toasted butter pecans! Topped with a lightly cinnamon frosting for a cupcake that's ready for fall. Created by our contributor, Lindsay Conchar. So, it's always about this time year that I can't decide if I am excited for fall to make its appearance or if I wish summer would hang around a little longer. I love the cooler weather, but I always miss the abundance of fresh berries and other fruit. I ... Continue Reading
10 Fabulous Flamingo Treats
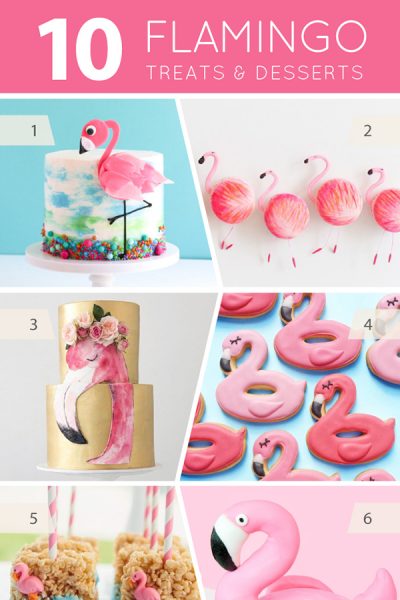
Flamingos, flamingos, everywhere. While this pretty pink bird enjoys an extended moment in the spotlight, first stealing our hearts two summers ago, it seems as though their staying power is almost as majestic as their whimsical legs and billowing feathers. And we simply can't help but bask in all the colorful summer vibes. Pink, tropical with a nod to retro, seriously what's not to love? So today we're taking a look at some of our favorite flamingo sweets. From flamingo cakes to flamingo ... Continue Reading
Fourth of July
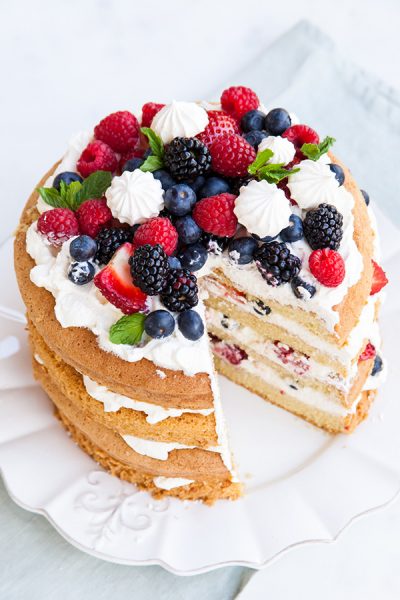
EATON MESS CAKE BERRIES AND CREAM CUPCAKES FIREWORKS CAKE RED WHITE & BLUE DESSERTS LEMON BLUEBERRY CAKE PATRIOTIC PINWHEELS STRAWBERRY SWIRL CAKE CHEESECAKE SHOTS STRAWBERRY PICKING VINTAGE PATRIOTIC CAKE LEMON BLUEBERRY CUPCAKES PINWHEEL COOKIES COOKIE DOUGH ICE CREAM SAMMY STRAWBERRY THYME CAKE AMERICANA QUILT CAKE RED WHITE & BLUE STRAWBERRY MATCHA CAKE ROASTED BLUEBERRY ... Continue Reading
- « Previous Page
- 1
- 2
- 3
- 4
- …
- 12
- Next Page »
