If you've been reading for a while, you may have noticed that I'm a fan of holidays! And why not? Holidays are all about family and friends getting together, delicious food and maybe even a few drinks. Generally there is cake involved, in some form or fashion! But it seems as though some holidays are known for having great cakes and well, others are not. When I think of the 4th of July holiday, one traditional cake always comes to mind. I'm sure we've all enjoyed a slice of sheet cake ... Continue Reading
Search Results for: white
Stars & Stripes Cheesecake Shots
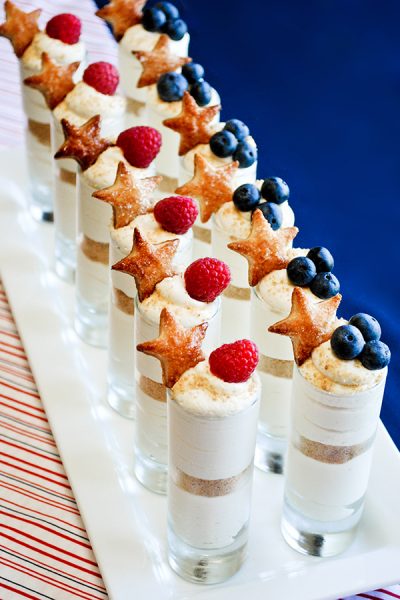
Stars and Stripes Cheesecake Shots. No-bake cheesecake filling layered with graham cracker crumbs, topped with fresh berries and puff pastry stars for a patriotic 4th of July dessert. With the 4th of July holiday right around the corner, we're gearing up for some fun with these easy no-bake cheesecakes. Mini dessert glasses are filled with creamy cheesecake filling and layered with graham cracker crumbs and then topped with berries. These little treats have become a staple at our ... Continue Reading
DIY: Glittering Flower Petals
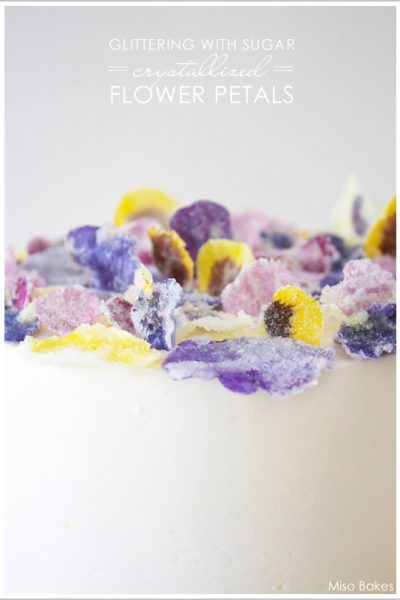
Our contributor, Miso of Miso Bakes, is sharing a fabulous new tutorial perfect for summer... The first thing that comes to mind when I think of summer is not barbecues or lemonades or days spent at the beach, but rather William Shakespeare's A Midsummer Night's Dream. Several years back I had the opportunity to watch the play at the Globe Theater in London. I do not recall much about the cast nor their interpretation of the text, but I do recall a particular scene in the woods where the ... Continue Reading
Lalaloopsy Birthday Cake
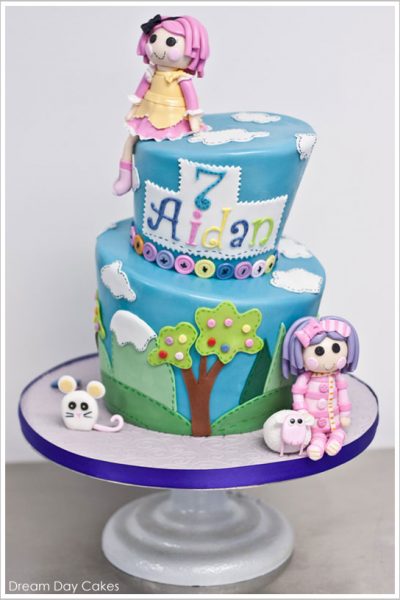
Today's featured cake is simply sew cute! This Lalaloopsy inspired birthday cake was created for a fan of these magical rag dolls. Now, the Lalaloopsy girls and their colorful world come to life... in the form of a cake! Yeni Monroy and her team at Dream Day Cakes® perfectly capture the whimsical land of Lalaloopsy with oodles of buttons and stitch detailing on everything from the hills and trees to the fluffy white clouds. Plus a touch of lalalove! Come along with me as we enjoy this ... Continue Reading
Star Spangled S’more Bars
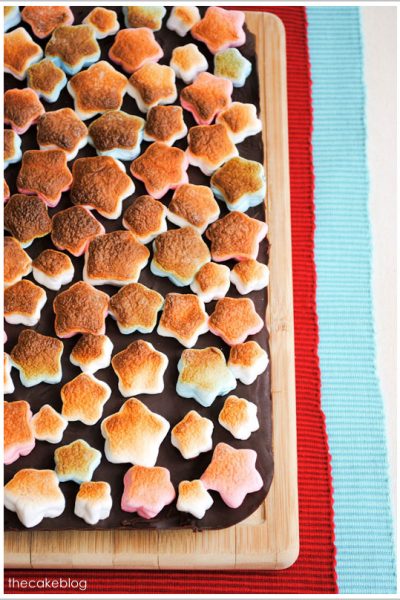
I'm guest blogging over on Hostess With the Mostess today! I'm sharing a new recipe just in time for your upcoming Memorial Day celebrations. A festive update on an all-American classic... s'mores! What BBQ is complete without some s'more goodness? And since it is a holiday, these little guys are all dressed up and showing off their patriotic pride! They're not just any old s'more bar... they're Star Spangled S'more Bars! A graham cracker crust is topped with a silky smooth chocolate ... Continue Reading
Sugar Peonies & English Roses

Today's incredible cake was inspired by a love of peonies and English roses. But not just any English rose. The lovely English roses from David Austin Roses, a prestigious breeder whose roses are best known for their layers of petals, complex centers and garden rose appearance (making them a popular choice for today's brides). Trinh of Cake Avenue, captured the natural charm of a cottage garden and brought it to life in the form of sugar! Beautiful, delicate blooms in dusty, pale pink and ... Continue Reading
Strawberry & Vanilla Swirl Cupcakes
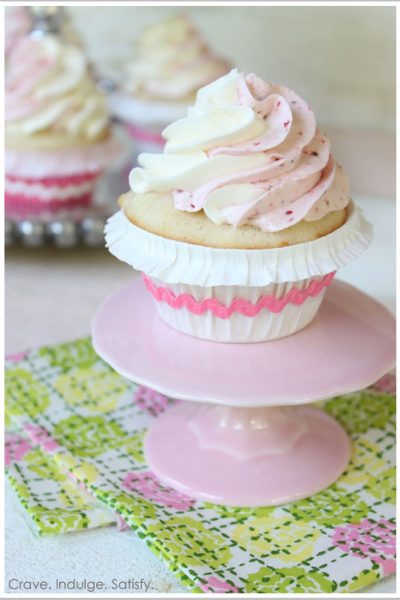
Our cupcake contributor, Lauren of Crave. Indulge. Satisfy., is back today! We missed Lauren last month... she was busy becoming a new mother!! Congrats to Lauren on the birth of her son! And speaking of moms, Lauren is sharing a fabulous recipe just in time for Mother's Day! I'll let Lauren take it away from here... Just in time for Mother's Day I'm excited to share a delicious cupcake recipe that any mom is sure to love! This recipe is packed full of special flavors to create the ... Continue Reading
Oceanside Beach Beauty

The deep blue waters of the ocean. A pale blue sky. An impeccably tailored white-on-white textured cake. I so want to dive, head first, right into this gorgeousness! Today's featured cake comes to us from Melissa of Buttercream Couture and it is simply fabulous! I'm talking spend-the-afternoon-at-the-yacht-club kind of fabulous! It's elegant, modern and and makes me want to sail off into the sunset... with a slice of cake! From the layers of overlapping fondant bands to the fantasy ... Continue Reading
DIY: Hungry Caterpillar Cookies
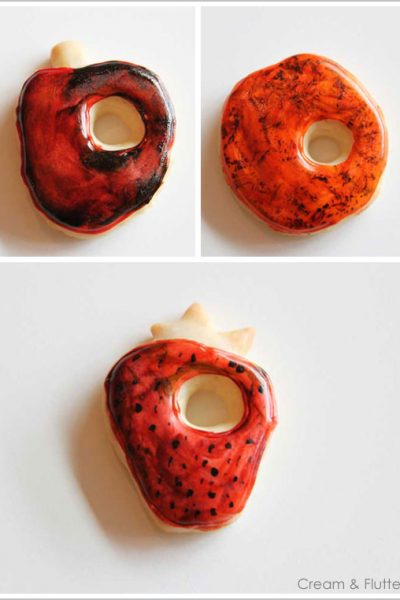
The Very Hungry Caterpillar is a favorite read in my house. My daughter absolutely loves it! And I'm absolutely in love with all of the Eric Carle inspired cakes and parties popping up lately, as are many of you! That's why you're going to flip over today's tutorial! The lovely ladies at Cream & Flutter recently hosted an adorable Baby Shower inspired by this classic book. (You may remember Cream & Flutter from the oh-so-creative and mega popular Gender Reveal Cupcakes we featured ... Continue Reading
Romantic Rose & Peach Dessert Display
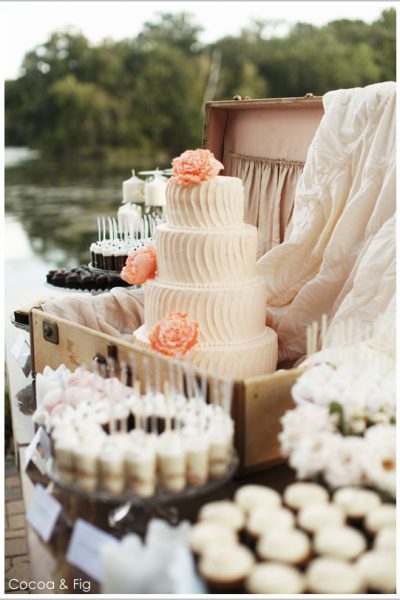
When I received a sneak peek of today's feature in my inbox... I was smitten at first glance. Hellllllo Gorgeous! A refined yet rustic dessert table filled with scrumptious mini desserts AND a stunning cake! All created by the same bakery. Pale rose cream cheese icing with a delicate ripple pattern that almost mimics the ripples of the nearby lake. Dusty peach sugar flowers so dainty and quaint. Arranged in a vintage, silk-lined suitcase. It's enough to make a girl feel faint! If you ... Continue Reading
Baby Love Baby Shower
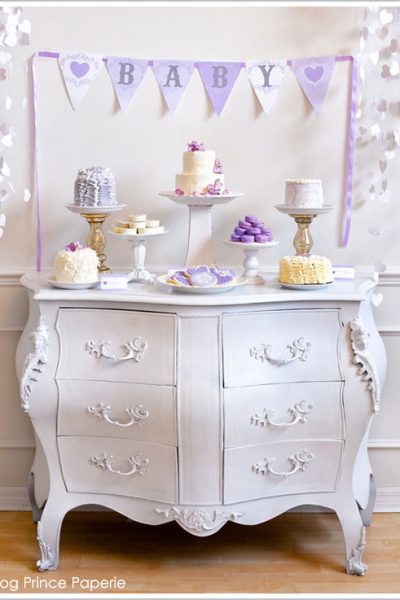
Today's real party is a shower full of both baby love and cake love! From the paper heart garlands that hung overhead to the five beautiful cakes served up on an antique dresser, this shower will steal your heart! Hosted by my sweet friend Paula from Frog Prince Paperie, this shower sprinkled the mother-to-be with oodles of love and deliciousness! Rustic cakes... ruffle cakes... gorgeous ruffled heart cookies... damask cookies... lavender macarons... on and on! It's a feast for both your ... Continue Reading
Jelly Bean Flower Cupcakes

Happy Monday! I'm guest blogging today over at The TomKat Studio. I shared a tutorial for for these adorable Jelly Bean Flower Cupcakes! And I'm sharing it here as well. These little treats are super simple and perfect for your upcoming Easter celebrations! Today we’re taking the jelly bean from basket filler to the star of the show! In a few simple steps, your cupcakes will be blooming with beauty and ready for Easter! (Or any other springtime celebration.) So easy, even the kids ... Continue Reading
Mod Elephant & Chevron First Birthday
I love seeing the creativity of women shine through when planning parties for their children. And today we have an amazing example of just that! Stay at home mom, Heather McKinney, is not new to our site... we featured the adorable Giraffe 1st Birthday Party she hosted for her oldest son back in 2010. So when I saw a note from this talented mother in my inbox, I knew it was going to be good! Navy, yellow and grey pair up to celebrate another first birthday in the McKinney house. Created ... Continue Reading
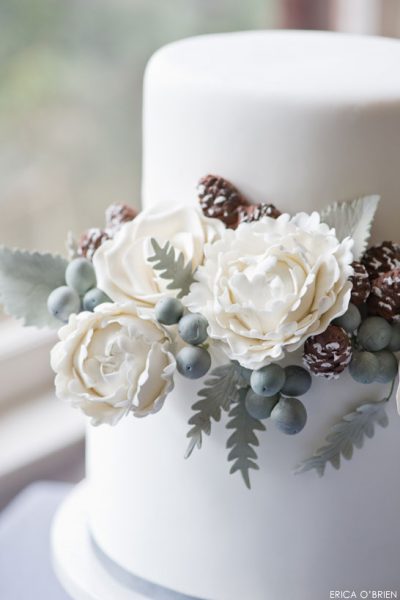
Honeycomb & Gilded Bee Cake
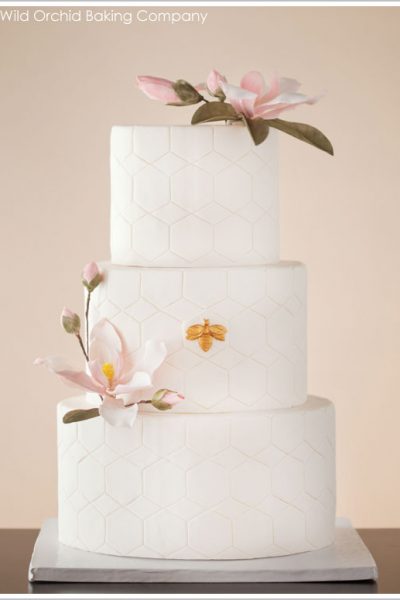
When I first saw today's featured cake, I instantly wanted a re-do on my own wedding cake! When it comes to cake style, my first love will always be simple sophistication. Timeless. Classic. Elegant. With its subtle use of pattern and great white-on-white texture, today's design by Erin Gardner of Wild Orchid Baking Company would be perfect for any preppy-chic-loving bride. Can we say impeccable style? Featuring a gorgeous honeycomb pattern, delicate magnolias and a single golden bee... ... Continue Reading
Blushing Wedding Cake
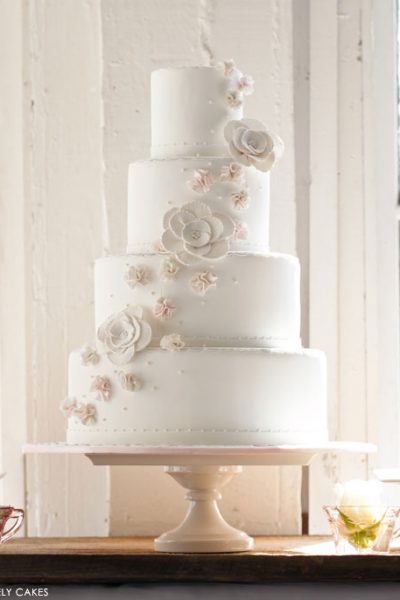
We're starting off the week with a big spoonful of cake love! Today's beauty has all of the ingredients to make our hearts flutter. A soft color palette of whites, creams and light blush paired with delightfully delicate details. Small ruffled flowers intermix with larger 'fabric' flowers in full bloom. This cake softly whispers romance... do you hear it calling? We do... and it has us smitten! Created by Lovely Cakes for a collaborative wedding shoot, prepare to swoon over this ... Continue Reading
Fabulous Hostess Aprons
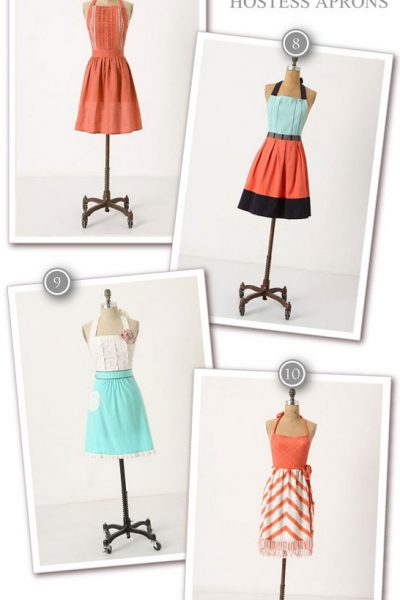
It's Friday! And I think it's time for us to have some fun and go shopping together. Window shopping that is! A few Fridays ago, we went window shopping for cake stands. Based on your response to that post, I think we should spend every Friday shopping together! Are you in? Today we're on the hunt for another one of my favorite things... aprons!! Presentation is key when it comes to food and baking, but it's equally important for the woman behind the whisk to look good. With all the ... Continue Reading
Minnie Mouse 1st Birthday
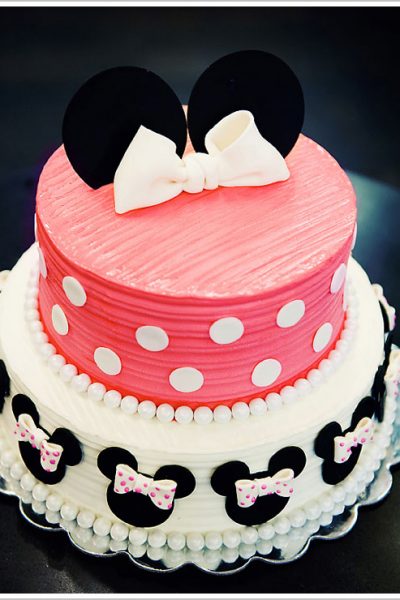
Why hello, beautiful birthday! Today's party comes to us from the same talented lady who brought us the charming Barber Shop Birthday last September. While that party was definitely a manly-man theme, today's party is all girl! With a hot pink, black and white color scheme, polka dots, damask and feathers... this party is so sassy. And talk about oodles of incredible desserts. This party would have Minnie herself saying "Aren't you sweet!" Let's take a look at this precious Minnie Mouse ... Continue Reading
Fabulous Cake Stands
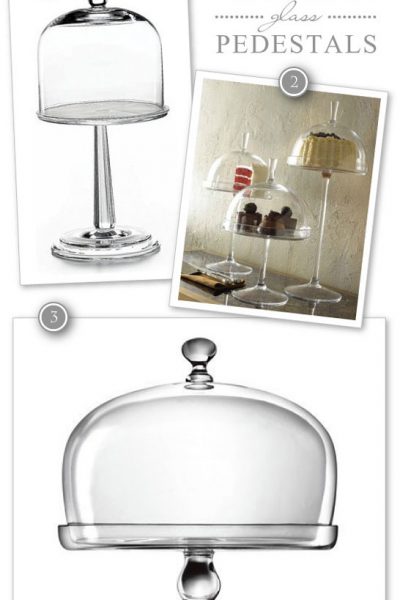
It’s Friday! So I thought we’d have some fun and go shopping together. Window shopping that is! For one of my very favorite things… cake stands! Can a girl have too many cake stands? I say, no way! They’re almost like shoes… the perfect accessory to glam up to your sweet treats and cakes. So we're taking a look at some of my favorite stands and pedestals right now. From tall and dainty, to glass domes and mini stands. These are some Fabulous Cake Pedestals! Crystal clear, tall and ... Continue Reading
From Flowers… to Cake
Whether it's February 14th or 15th, love is in the air everyday here on the blog. Cake love that is! As we usher out Valentine's day, don't be sad. Today's cake will make your heart equally as happy! It's another great example of how beauty inspires beauty! We talk a whole lot about inspiration day after day. A few weeks ago, we featured a gorgeous Ruched Cake inspired by the bride's wedding dress. Today we take another look at cake inspiration. So, what happens when a talented cake ... Continue Reading
DIY Lacy Sugar Doilies
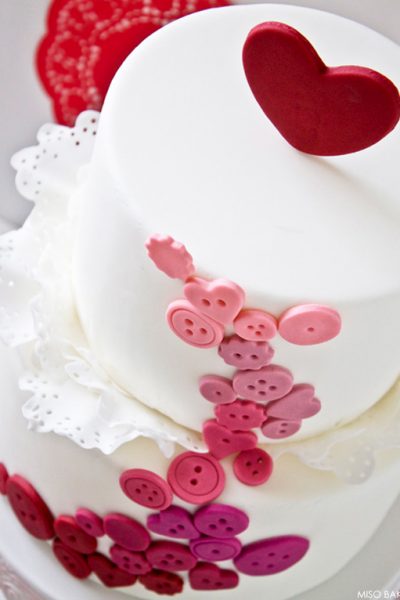
Just in time for Valentine's Day, things are about to get a little lacy. Crochet, lace and doilies have been making an appearance in weddings and parties for months now. We see lace doilies being repurposed for garlands, favors, gift wrap, lanterns, corsages and more! So why not add this same touch of vintage charm to a cake? Our contributor, Miso of Miso Bakes, created today's oh-so-cute button cake based on one of her earlier designs. This time, Miso gave the cake a more delicate and ... Continue Reading
Sweet Valentine’s Inspiration

Love is in the air as Valentine's Day draws near! From here until the 14th, we're all about the sweet inspiration for Cupid's holiday! Because really, nothing says 'I Love You' like something sweet and delicious. Today we're crushing on some incredible goodies from our friends at The Pastry Studio! With red glittering hearts and oh-so-pretty lips ready for smooching, these Valentine's treats are sure to make your heart flutter! Oh the glitter!! Red velvet cupcakes and chocolate ... Continue Reading
Ombre Ruffle Cupcakes
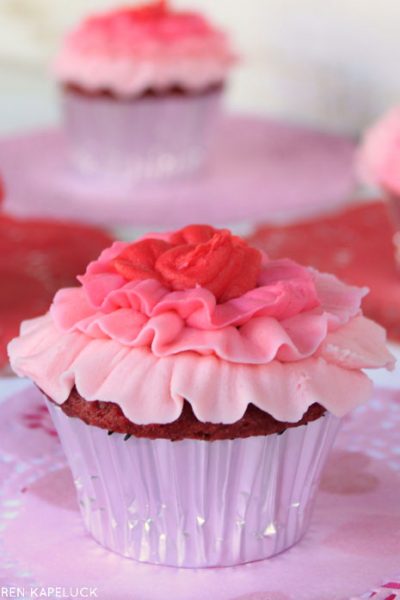
Our cupcake contributor, Lauren Kapeluck of Crave. Indulge. Satisfy., is sharing a Valentine's recipe to make you swoon... February is a month full of sugar, love, and all things pink and red! When I think of sweets the first thing that comes to mind is Red Velvet cake, followed closely by chocolate. So with Valentine's Day quickly approaching what better way to show someone you love them than with a batch of Red Velvet Cupcakes frosted with a decadent White Chocolate Icing! I know you may ... Continue Reading
Snow Owl 1st Birthday
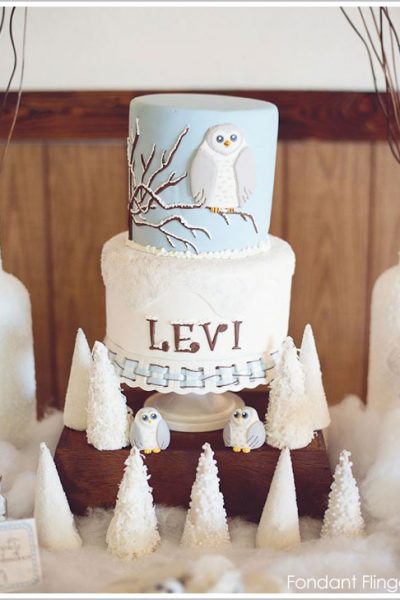
Whoo... Whoo... Look whooo's turning one?!? Oh my goodness, today's party is soooo incredibly adorable! It's a snowy, winter dream filled with sweet owls and sweet treats! Created by Rachel Skvaril of Fondant Flinger for her son's 1st birthday, this celebration is just dreamy! A soft blue, grey and white color scheme is accented with small touches of woodsy brown. Perfect for a winter birthday and a birthday boy who chants "whoo, whoo", this Snow Owl First Birthday is a hootin' good ... Continue Reading
DIY: Frilly Handmade Carnations

Today's post is twice the treat! Not only do we have a beautiful new cake design to showcase, but we're going to learn something new as well! Our contributor, Miso of Miso Bakes, created this incredible cake and is kindly sharing one of her techniques with us. So once we finish swooning over Miso's lovely design, we'll learn how to make one of the elegant sugar flowers she used. Frilly and flirty, carnations are not just a filler flower! They're a great place to start if you're new to ... Continue Reading
Up, Up and Away Baby Shower
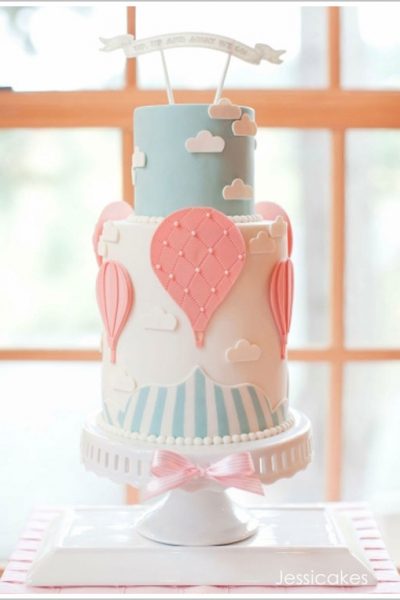
Hold on to your hats because today's adorable baby shower is sure to blow you away! Up, Up and Away, that is! When I first received a note from Jessica Harris about this event... I knew it would be good! We've had the pleasure to ooh and awe over Jessica's cakes in the past (see them here). She is an incredible cake designer who also happens to be part of a family of artistic women! So what happens when a talented graphic designer (Kim Harris), cake designer (Jessica Harris) and ... Continue Reading
Italian Cream ‘Snowball’ Cupcakes
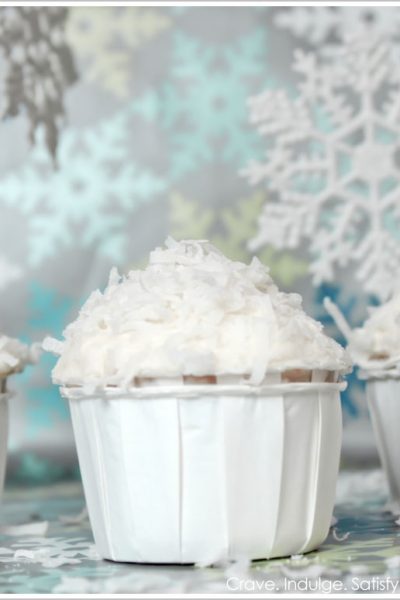
Our cupcake contributor, Lauren of Crave. Indulge. Satisfy, is back with her first post of the year... Happy New Year! I hope everyone had a wonderful holiday season and is looking forward to a fresh start in 2012! I am excited to kick off a new year and share one of my family's favorite recipes for Italian Cream Cake. This is a family recipe that has been around for as long as I can remember and one that we always enjoy around the holidays, especially the winter months. With winter ... Continue Reading
Fresh & Feminine Cake Table
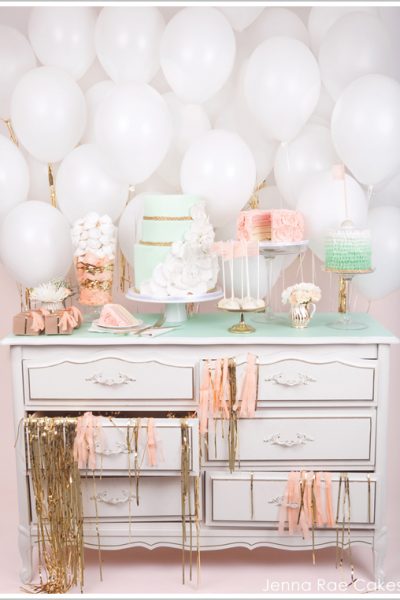
Nothing cures the Monday blues like a big dose of pretty! And that's exactly what we have in store for you today. We're starting off the week with a romantic dessert table to make you swoon! With buttercream frills, ruffled rosette swirls and ombre, this display will steal your heart. The soft pastel color scheme is a perfect combination of peach and mint with a pop of gold. Featuring three incredible cakes, a whimsical balloon backdrop and festive streamers... feast your eyes on this ... Continue Reading
- « Previous Page
- 1
- …
- 11
- 12
- 13
- 14
- 15
- 16
- Next Page »
