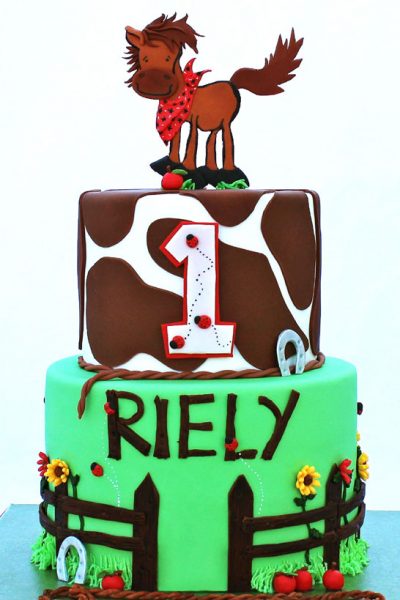
Today's feature is one of those cakes that just makes you feel happy! And it's easy to see why. Who can resist a charming horse wearing an adorable bandana? With a tousled mane and infectious smile, this little guy will steal your heart. He's the star of this playful 1st birthday cake, created by Peggy Lee of Peggy Does Cake. Wooden fences encircle a field of sunflowers while ladybugs flutter about. Silver horseshoes, rope borders and a few red apples complete the delightful country ... Continue Reading
Search Results for: white
Welcoming Spring Flowers

April is upon us and we're really starting to see the first signs of Spring. To include those pesky spring showers. But have no fear... April showers bring May flowers, right? So to help us tolerate the all the rain to come, we're going to focus on the pretty side of that old saying with a cake that is all about the flowers. Gorgeous. Bright. Flowers! Today's design comes to us from Rachel Skvaril, owner of Fondant Flinger in New Orleans. Rachel has a flair for creating incredible ... Continue Reading
Black & Ivory Ruffle Cake
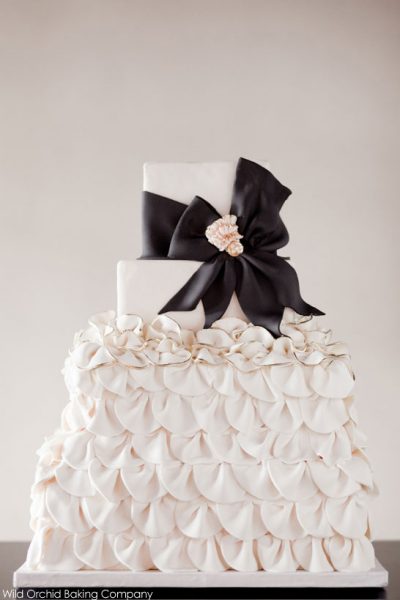
Happy Monday! We're kicking off the week with a cake that is nothing short of dreamy. There's something so sophisticated and refined about a classic color combination like black and ivory. So when you add in a touch of shimmering gold and an abundance of flowing ruffles, you've got sweet perfection. Inspired by a wedding dress, today's cake is ready to waltz down the aisle. You're seriously going to love this one! I mean, LOVE! With its rows upon rows of scalloped ruffles, elegant black ... Continue Reading
Mint, Blush & Gold Flowers
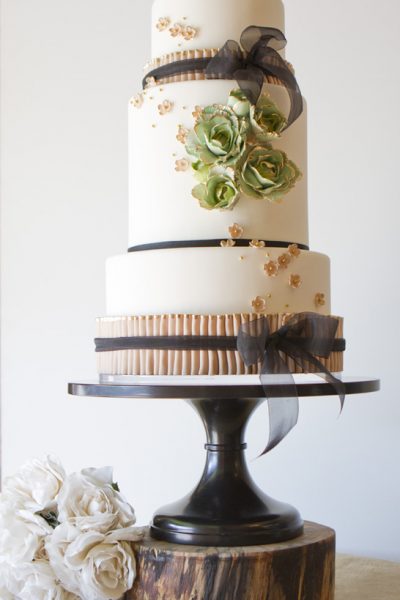
In case you didn't get enough on St. Patrick's Day, we have a little touch of green to start off your week. But we're not talking cutesy leprechaun green here. We're talking gorgeous mint green with elegant touches of gold. Paired with a blush pink and a contrasting black, creating one hot color combo for spring. Delicate roses and tiny pink blossoms get an extra touch of fabulous with gilded gold accents. And then there's the perfectly ruffled fondant ribbon. Dancing around two of the ... Continue Reading
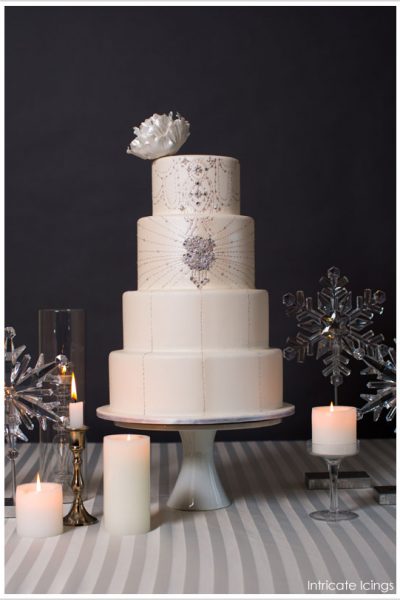
Pearlescent Shades of Gray Cake
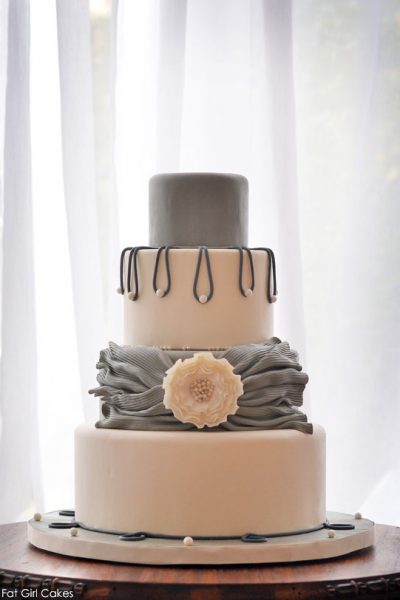
Oh for the love of simple sophistication. There's nothing like a cake with clean lines and a touch of romance to get your heart racing. And that's exactly what we have for you today. Soft creamy white meets several shades of grey in this polished design created by Kristin Kirkpatrick , owner of Fat Girl Cakes in Virginia. A textured grey sash, gathered with a delicate fantasy flower, creates a gorgeous focal point and reason alone to swoon. And then there's the pearls. The oh-so-cultured ... Continue Reading
Speckled Egg Cake
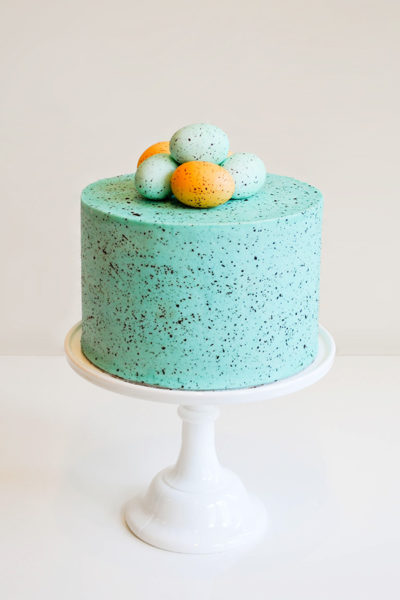
It might not feel like it, with cold air and snow still hanging around, but Spring is just around the corner. Before you know it, the first buds of green will be popping up on tree branches. Birds will be chirping. Flowers will be blooming. And Easter will be on the way! So today we're getting ready with a new cake tutorial that is all about Spring! Inspired by the gorgeous color and texture of robins' eggs, this cake is super easy and incredibly fun. And completely achievable for all ... Continue Reading
Sleek Ruffles & Stripes
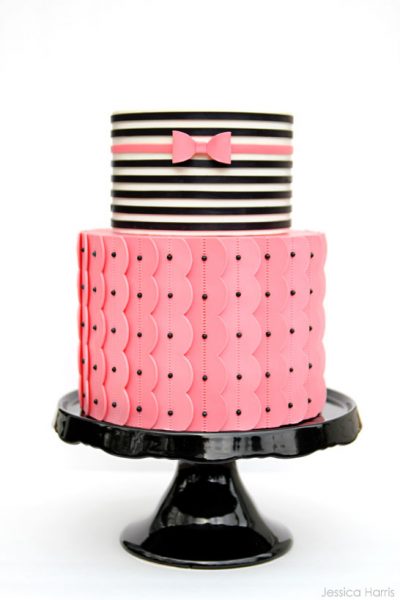
Today's featured cake is one of those cakes. You know the ones that I'm talking about. The cakes where your where heart takes a little leap and you know instantly. I am in love! Maybe it's the clean lines. Maybe it's the bold colors. Maybe it's the sleek sophistication. But this cake has stolen my heart and I know you're going to fall for it too! It comes to us from Jessica Harris, of the Jessicakes Blog, and sports her signature graphic style. Black and white stripes, so crisp and ... Continue Reading
Preppy Nautical Cake
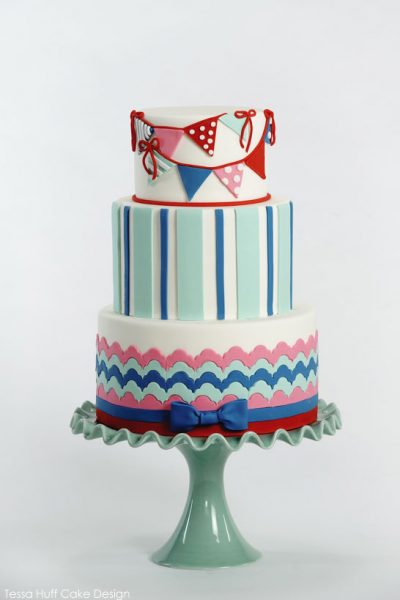
It might still be winter, but our forecast includes bright skies and calm waters. The perfect conditions to set sail! Today's featured cake is so full of nautical goodness, it will have you longing for the crash of ocean waves and the crisp sea air. Created by Tessa Lindow Huff of Style Sweet CA, this cake is after our water-loving hearts. The classic red, white and blue color scheme gets a charming update with an unexpected touch of pink and Tiffany blue. While bold stripes and playful ... Continue Reading
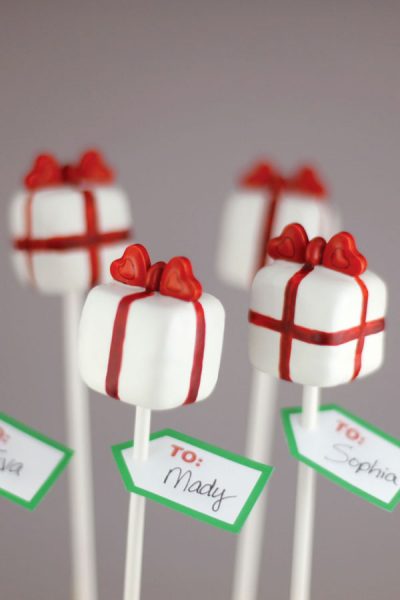
Red Carpet Tuxedo Cake Pops
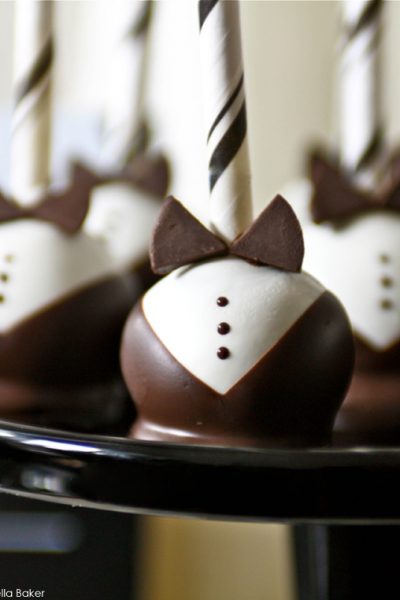
It's time to roll out the Red Carpet and settle in with your besties. On Sunday night, the glitz and the glam of the the Academy Awards returns. The fashion will be fabulous as the stars shine on Hollywood's biggest night. And today we have a recipe to help make your Oscar Night fabulous, right there at home. Just like Hollywood's starlets, you'll be surrounded by a sea of handsome tuxedos as the winners are announced. Granted, these tuxedos will not be on the likes of Bradley Cooper and ... Continue Reading
Purple Ombre Buttercream Cake
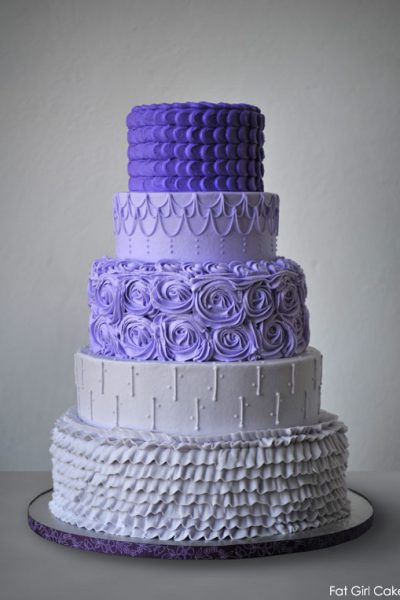
Buttercream. Buttercream. Glorious Buttercream. Today's cake is all about the buttercream. Ruffles, roses, petals, swags, swirls and dots. This cake includes just about every popular buttercream technique from today's cake scene. Armed with shades of purple and a piping bag, Kristin Kirkpatrick , owner of Fat Girl Cakes in Virginia, proves that buttercream can be just as fabulous as fondant. Each tier of today's cake boasts a different piping style, giving buttercream lovers something to ... Continue Reading
Ladyfinger wrapped Cheesecake
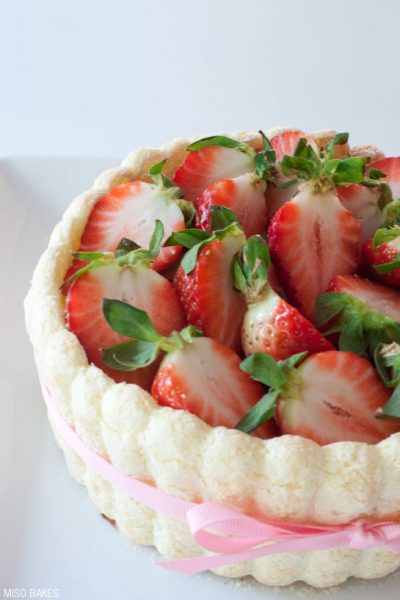
Our contributor, Miso of Miso Bakes, is here with a new recipe for Valentine's Day … This Valentine’s Day, I wanted to keep it simple. I realized most people prefer rich cheesecakes or silky mousse cakes during this loving holiday, so I figured a sugarpaste or buttercream tutorial would not be too practical. Today, I would like to share how to make ladyfingers. They are a must when it comes to making tiramisu and Charlotte Russe mousse cakes. You may definitely use this recipe if you ... Continue Reading
Favorite Things Birthday
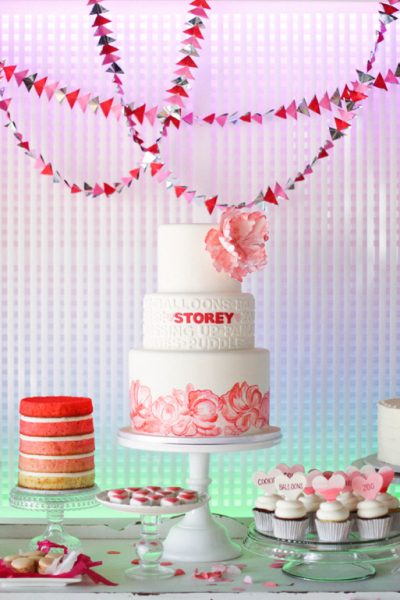
Today's feature is seriously so gorgeous, you're going to fall. in. love. Head over heels! You probably remember Storey's 1st birthday... a glittery gold and pink party that we featured last year. You all loved it so much, it was one of the most popular posts of 2012! Well if it is possible, Storey's 2nd birthday is even more beautiful. Confetti, balloons and all of the birthday girl's favorite things are brought together in shades of pink and red. Impeccable styling by Storey's mother, ... Continue Reading
Recipe: Football Whoopie Pies

I can hardly believe it's the end of January already! And that The Big Game is quickly approaching. Whether you love football or hate football, you'll probably find yourself surrounding a flat screen on Sunday. Chatting. Eating. And hoping that your team gives you something to cheer about. Or that the commercials come back on soon! However you enjoy The Big Game, every party needs a dessert. It can't all be about the hot wings and chips. And football-shaped bites of cake sound perfect ... Continue Reading
First Communion Dessert Table
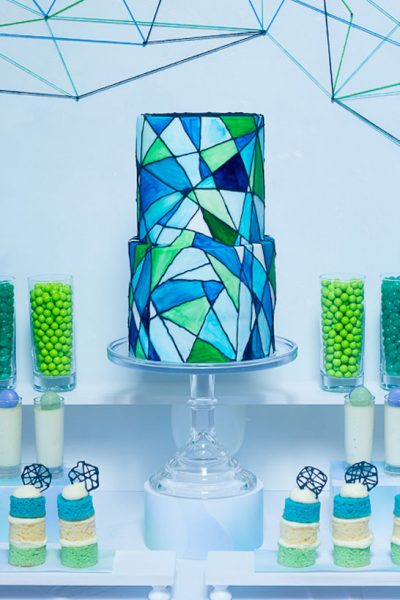
If you've ever planned a First Communion or Baptism celebration, you know what a challenge it can be to create something new and modern yet still appropriate for the occasion. Which is exactly why you're going to love today's feature! Shades of blue, navy and green bounce around this dessert table filled with vibrant color and style. Inspired by the look of stained glass windows, Jacki Fanto of Blissfully Sweet created this dessert display for her son's First Communion celebration. A ... Continue Reading
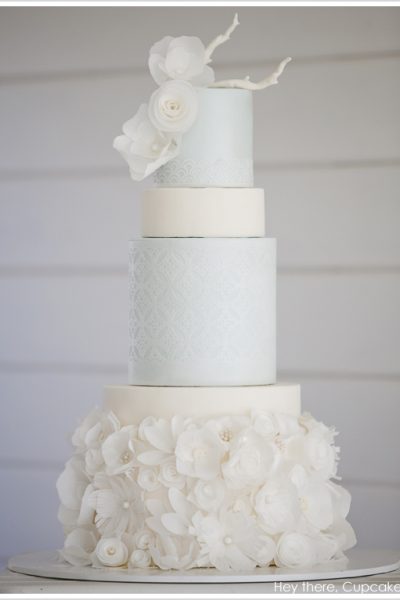
Spirals & Poms Baby Shower Cake

There's nothing like a group of women, gathered together, to celebrate a baby on the way. And a party designed to welcome a precious little baby deserves a precious little cake. That's where today's featured design comes in. Created for a baby shower and inspired by the event decor, this cake is a tiny piece of party heaven. Playful pom poms are translated into hundreds of sugar petals nestled tightly together. Giving this cake a very fabulous, very frilly, pom-like bottom tier. And if ... Continue Reading
DIY: Macaron Cake
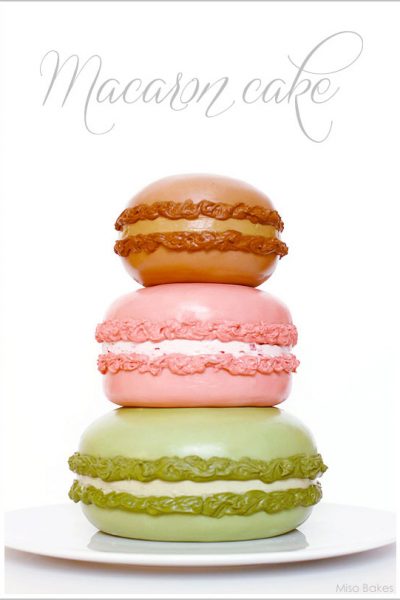
Our contributor, Miso of Miso Bakes, is here with a new DIY for you today … I am extremely excited to share this first cake tutorial of 2013 with all of you! It is a cake inspired not only by my love for the confection, but also by the question I am asked the most: How do you make macarons? Macarons are a light, sweet and subtly chewy cookie sandwich filled with ganache, buttercream, or jam. Though the ingredients are fairy simple and are composed of egg whites, almond flour and ... Continue Reading
Merry Christmas!
I am officially signing off for a few days to spend Christmas with my family. But before I go, I thought I’d leave you with a quick recap of our holiday cake series…. it’s been a busy month of beautiful Christmas inspiration here on The Cake Blog. Created by some of today's top bakers, especially to inspire you! As I went through all twelve cakes again, I just had to stop for a moment. I am in awe of the immense talent showcased in these twelve cakes. It is remarkable to see how each of ... Continue Reading
12th Cake of Christmas
I can hardly believe we've come to the end of our holiday cake series, The 12 Cakes of Christmas! We've spent the last three weeks oohing and awing over gorgeous cakes, designed by some of today's top bakers, and created especially to inspire you to holiday greatness! Eleven talented cake designers were asked {pretty, pretty please} to create innovative and elegant cake designs appropriate for both Christmas parties and winter weddings. Along the way we've also enjoyed some exceptional DIY's ... Continue Reading
Bakerella DIY & Interview
The holiday baking inspiration continues today with a little help from The Queen of Cake Pops! We all know her. We all love her. We've been reading her blog for years. And following along as she inspires the world to love little bites of cake, rolled up and perched on a stick! Who knew cake pops would become such a phenomenon? I'll tell you who.... I can hardly believe it but Bakerella is here! Angie Dudley, also fondly known as Bakerella, is talking cake pops with us! She's here to ... Continue Reading
11th Cake of Christmas
The holiday inspiration continues with our newest cake series, The 12 Cakes of Christmas! We’re celebrating twelve days of beautifully festive cakes, created especially to inspire you to holiday greatness! Twelve talented bakers were asked to create innovative and elegant cake designs appropriate for both Christmas parties and winter weddings. And along the way, we get an up close look at what inspires this talented group. It’s 12 bakers baking…. it’s The 12 Cakes of Christmas! The ... Continue Reading
DIY: Mistletoe Tutorial from PetalSweet
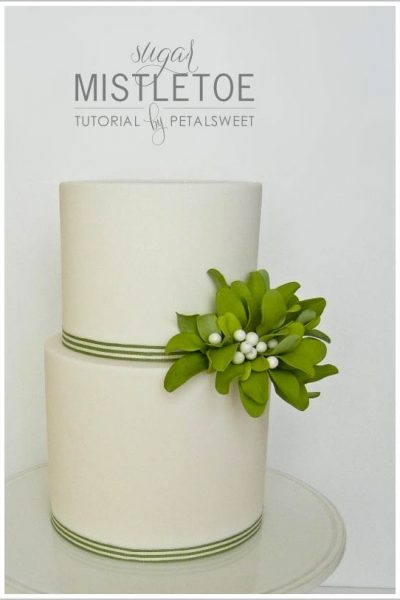
An entire month of holiday inspiration would not be complete without a DIY or two! Now that we're officially in the Christmas spirit and inspired to bake, we have a spectacular tutorial for you today. A DIY that is modern and sophisticated and just a touch of whimsy. It's one part festive and two parts fabulous! And it comes to us from the insanely talented Jacqueline Butler of Petalsweet! Jacqueline is an award-winning sugar artist, well known and loved for her meticulous sugar flowers. ... Continue Reading
9th Cake of Christmas
The holiday inspiration continues with our newest cake series, The 12 Cakes of Christmas! We’re celebrating twelve days of beautifully festive cakes, created especially to inspire you to holiday greatness! Twelve talented bakers were asked to create innovative and elegant cake designs appropriate for both Christmas parties and winter weddings. And along the way, we get an up close look at what inspires this talented group. It’s 12 bakers baking…. it’s The 12 Cakes of Christmas! The ... Continue Reading
Recipe : Peppermint Cupcakes for Santa
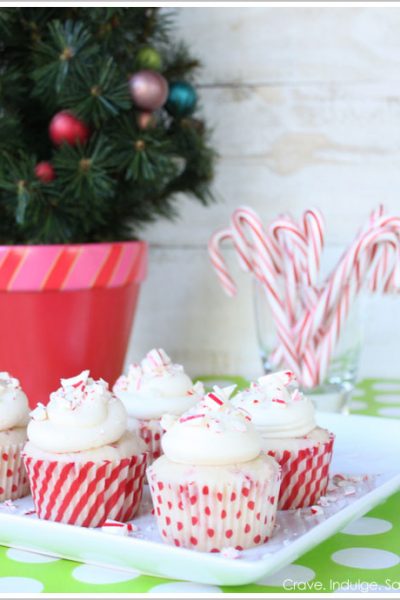
Our cupcake contributor, Lauren of Crave. Indulge. Satisfy., is here with a delicious new recipe…. It's official...I am in full holiday baking mode at my house! After a trip to World Market and discovering all sorts of adorable mint green and red baking tins, parchment paper and striped and polk a dot cupcake wrappers my mind has been going non stop dreaming up all sorts of sweet treats for the month of December! I went to the store and stocked up on a variety of flavored baking chips, ... Continue Reading
7th Cake of Christmas
The holiday inspiration continues with our newest cake series, The 12 Cakes of Christmas! We’re celebrating twelve days of beautifully festive cakes, created especially to inspire you to holiday greatness! Twelve talented bakers were asked to create innovative and elegant cake designs appropriate for both Christmas parties and winter weddings. And along the way, we get an up close look at what inspires this talented group. It’s 12 bakers baking…. it’s The 12 Cakes of Christmas! The ... Continue Reading
6th Cake of Christmas
I hope you're enjoying the month of December here on the blog! So much holiday fun from the fabulous KitchenAid Mixer Giveaway to the Free Printable Baking Chart featured yesterday. But now it’s time to get back to the cakes. The holiday inspiration continues with our newest cake series, The 12 Cakes of Christmas! We’re celebrating twelve days of beautifully festive cakes, created especially to inspire you to holiday greatness! Twelve talented bakers were asked to create innovative and ... Continue Reading
5th Cake of Christmas

Yesterday we announced a fabulous KitchenAid Giveaway, just in time for the holidays! But now it's time to get back to the cakes. The holiday inspiration continues with our newest cake series, The 12 Cakes of Christmas! We’re celebrating twelve days of beautifully festive cakes, created especially to inspire you to holiday greatness! Twelve talented bakers were asked to create innovative and elegant cake designs appropriate for both Christmas parties and winter weddings. And along the way, ... Continue Reading
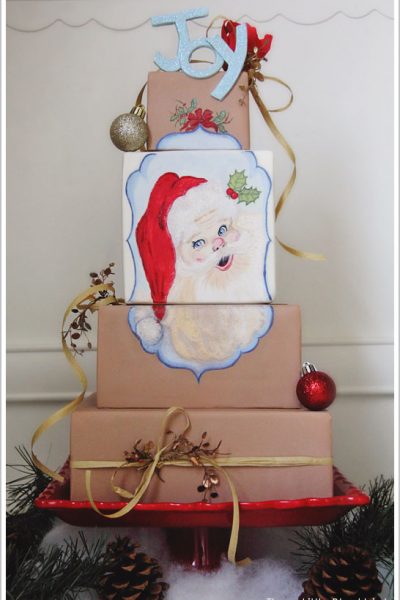
4th Cake of Christmas
Our newest cake series, The 12 Cakes of Christmas, is in full swing! We're celebrating twelve days of beautifully festive cakes, created especially to inspire you to holiday greatness! Twelve talented bakers were asked to create innovative and elegant cake designs appropriate for both Christmas parties and winter weddings. And along the way, we get an up close look at what inspires this talented group. It’s 12 bakers baking…. it’s The 12 Cakes of Christmas! The fourth cake in our series ... Continue Reading
- « Previous Page
- 1
- …
- 9
- 10
- 11
- 12
- 13
- …
- 16
- Next Page »
