
Our contributor, Tessa Huff, is back with a new cake recipe perfect for fall…. I don't know about everyone else, but from where I write and bake, the seasons are already subtly changing. Even though I do not have to return to school or anything, I can sense a shift in energy around the city. Soon it will be darker earlier, the tourists absent from the city center, and I'll need a scarf at the beach. However, as sad as it always is to see another beautiful summer come to a close, I do love ... Continue Reading
Search Results for: white
Succulent Wedding Cake
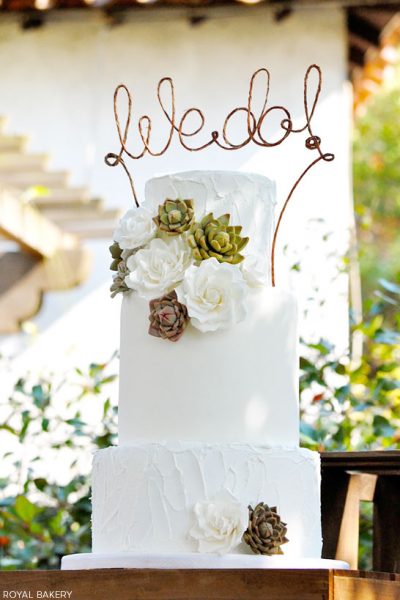
There is something so fresh and summery about succulents. They instantly take my mind to a warm, arid day somewhere in California, bright rays of sunshine streaming down. And well... what's not to love about that? So when you pair the natural beauty of succulent plants with delicate white roses and a gorgeous cake, the end result is nothing short of spectacular. Fondant succulents in hues ranging from pale grey and green to deep reds and rust are artfully arranged on a pristine white cake. ... Continue Reading
What Will It Bee Baby Shower

What will it be? What will it be? When you're expecting a child, that's the top question on everyone's mind. And today's feature is a thoughtful baby shower for a mom who chose to wait until the big day to find out. Building on the suspense, her family celebrated with a bright shower filled with fresh yellows and adorable bee details. It comes to us from Noelle Nielsen of Fishtale Photography who teamed up with Laurie Pyle of Cocoa & Fig to create this charming dessert display. Lovable ... Continue Reading
Metallic Watercolor Cake

I think I should start with a confession. I am slightly obsessed with today's cake. Alright, alright. Slightly obsessed is a bit of an understatement. I am totally obsessed with today's cake! Today's feature unites three of summer's hottest trends in one design that is far more gorgeous than 'trendy'. Allison Kelleher, owner of AK Cake Design in Portland, marries watercolor, metallics and stripes into one stunning trifecta of style. We've been loving these three independent trends all ... Continue Reading
Extreme Cakeover : DIY Makeup Bag
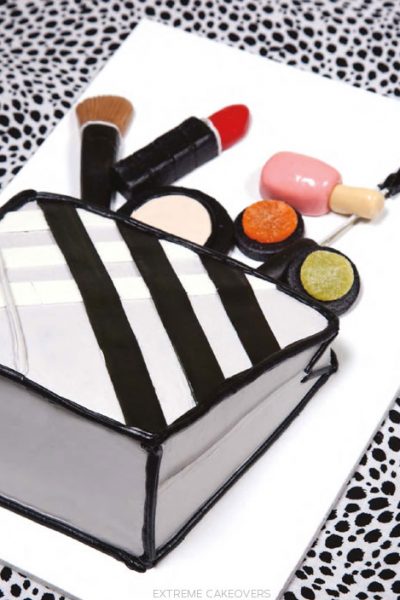
Today's post is a two-parter. First, we're celebrating a huge accomplishment by some of our talented cake friends. And second, we're sharing a fabulous new tutorial for you to try at home! Many of you are familiar with Rick and Sasha Reichart, owners of cakelava, in Oahu, Hawaii. We've featured many of Rick's gorgeous designs in the past, like this one and this one. Rick has been making incredible cakes for over 20 years and teaches his techniques to eager students around the world. So ... Continue Reading
Navy & Gold Toile Cake
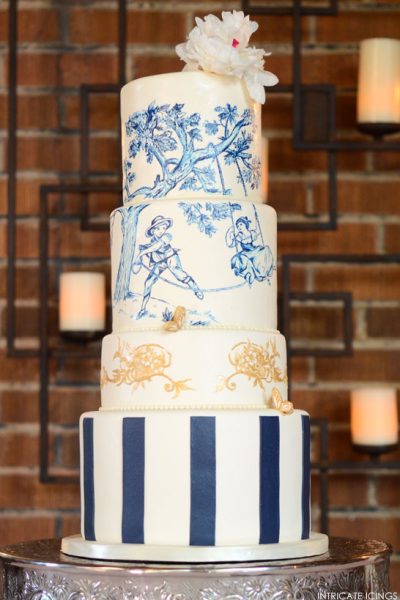
Today's feature seriously makes me wonder.... how can one cake include so many amazing details? First we start with a stellar color combo. Classic navy and white with a dash of shimmering gold. Then we move on to the stripes. Beautifully bold, extra wide, statement-making stripes. And then last but absolutely, positively, certainly not least, is the incredible toile pattern. A sophisticated scene full of countryside charm, hand-painted to replicate this timeless French fabric. It's all ... Continue Reading
Rustic Hipster Cake Trio
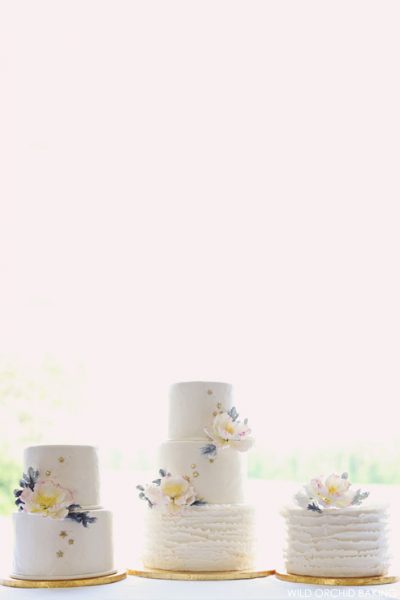
Sometimes, the least expected detail turns out to be THE detail that transforms a beautiful cake into an extraordinary cake! And today's feature is the perfect example of a little detail that speaks volumes. This stunning cake trio comes to us from Erin Gardner, owner of Wild Orchid Baking Company in in New Hampshire. Three separate cakes, three separate designs. All perfectly tied together with their soft white fondant, flirty ruffles, and incredible sugar flowers. And a scattering of ... Continue Reading
Pink, Peach & Mint Wedding Cake
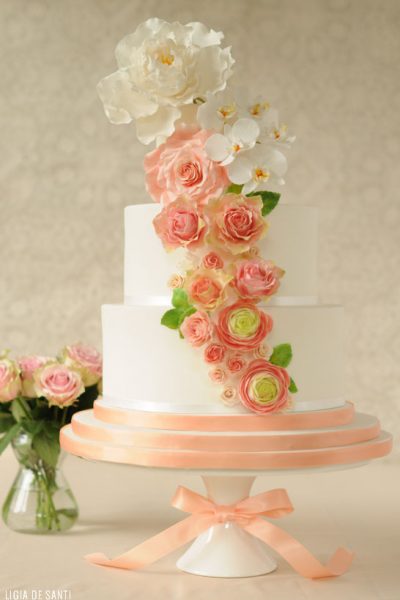
With its refined charm and feminine flair, today's featured cake has us blushing it's so gorgeous. Shades of pink, peach and mint highlight beautiful sugar flowers in full bloom. Sugar flowers so fabulous, they cascade up the cake. Growing in size from bottom to top. This incredible mix of blossoms, colors and sizes adds a little touch of drama to a traditionally elegant design. It's a combination of blooms that has us cheering for variety and appreciating the unexpected. And it comes to ... Continue Reading
Rose Petal Cake
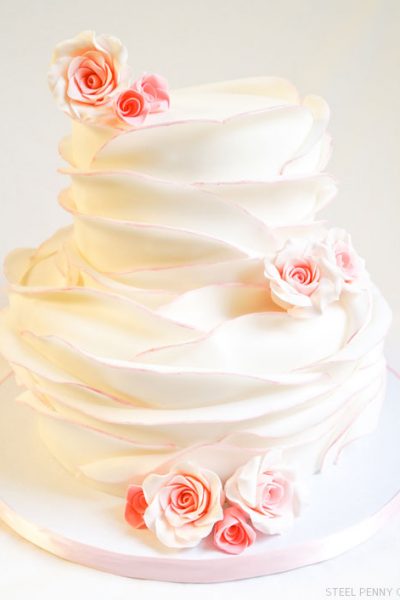
Today's cake is a fabulous new take on a classic wedding staple. Rose petals have held their own at weddings for as long as we can remember. Lining aisles and floating through the air as the happy couple makes their exit. Over the years, they've appeared in many great cake designs. And today's cake is elevating rose petals to a whole new level of love. It comes to us from Elysia Smith of Steel Penny Cakes in Mt. Pleasant, PA and is simply spectacular. Softly curved petals wrap around each ... Continue Reading
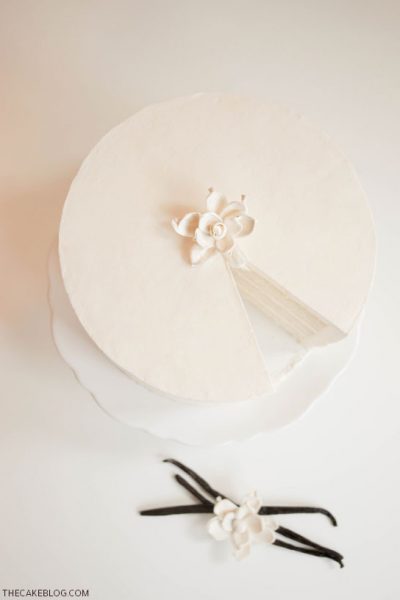
Mint Ruffled Rosette Cake
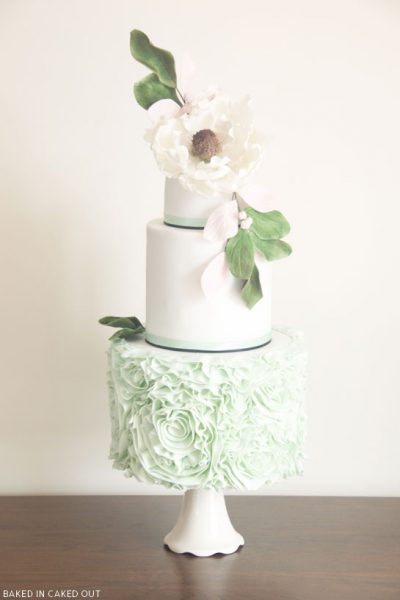
We're wrapping up the week with an elegant bridal cake fit for the prettiest of summer weddings. With a swoon-worthy color combination and ruffles to make you weak at the knees. Pastel mint is paired with soft white and the smallest hint of blush pink, contrasted by just a teeny pop of black. Ruffles go swirling, twirling all around as they gracefully flow from one delicate rosette to the next. While a sugar magnolia bloom tops off this design with a touch of romance. Ahhh, so ... Continue Reading
Vibrant Pinwheel Cake
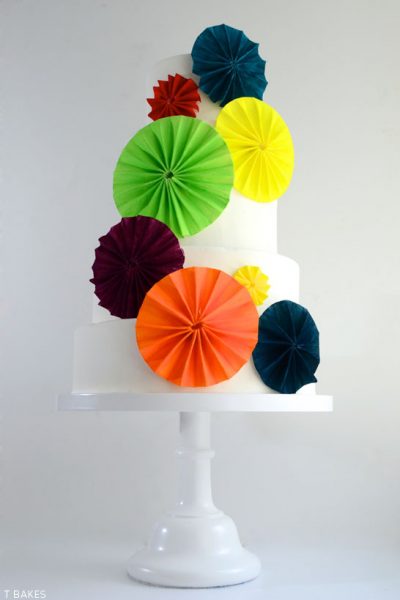
Have you noticed? Paper pinwheels are everywhere! From party decor to photo backdrops and DIY's, these accordion-like spirals are around every turn. And well, we just can't seem to get enough. So it's only fitting that this trend makes its way into the cake world. And that's exactly what we have in store for today. Only these pinwheels aren't paper... they're gumpaste! Tânia Sérgio, cake designer and co-owner of T Bakes in Portugal, created today's featured cake for a local festival. ... Continue Reading
Recipe: Coconut Lime Cake
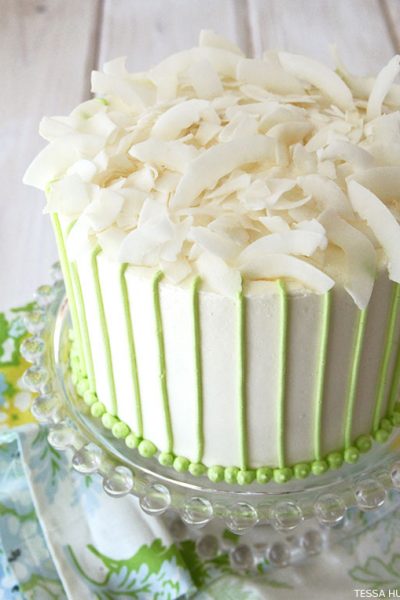
Our contributor, Tessa Huff, is back with a new summer cake recipe…. It must be all my daydreaming about tropical getaways that's got me stuck with lime and coconut on the brain. White-sand beaches, salty sea breezes, and a luscious pina colada in hand....I'll stop here before we all get carried away. If we can't make it to paradise this summer, let me help bring the tropics to you. I find that one of the easiest ways to bring far-away influences home in through food. Adding ... Continue Reading
Coral & Aqua Beach Wedding
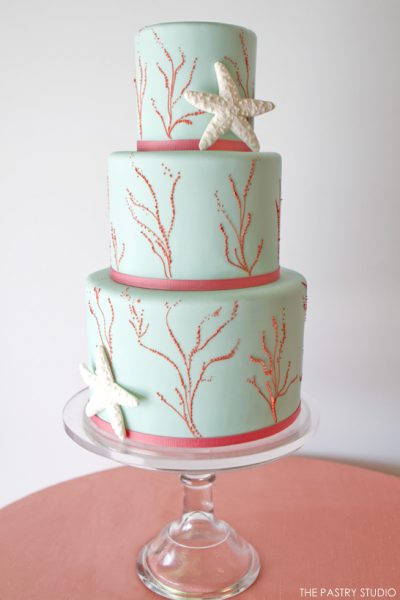
Shhh…. if you listen carefully, you can hear the sound of ocean waves crashing. Today’s feature captures the beauty of the ocean and the gentle roll of the tide in a three-tiered wedding cake. It comes to us from a bakery who knows a thing or two about seaside weddings. Sherri Meyers and her team at The Pastry Studio in Daytona Beach created this chic design for a beach wedding full of Florida charm. Soft aqua sets the stage for delicate coral piping, gracefully flowing up each tier. While ... Continue Reading
Bohemian Art Deco Cake

Today's featured cake is the perfect marriage of trend and elegance. It's one part bohemian and one part art deco. With a small pinch of tribal flair and a huge dash of glam. Creating a design that celebrates geographic pattern with a sophisticated combination of white, black and gold. It's both graphic and incredibly gorgeous. And we can thank Jessica Ludwig, owner of The Bake Boutique in southern California, for sharing it with us today! Jessica teamed up with some local area talent for ... Continue Reading
Recipe : Chocolate Chip Cupcakes
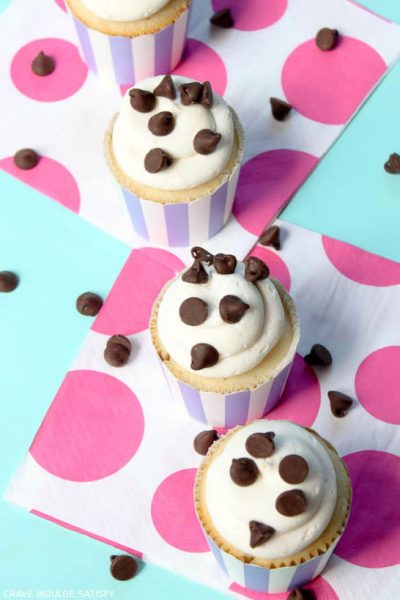
Our contributor, Lauren of Crave. Indulge. Satisfy., is back with a delicious new recipe.... Fruity or chocolate...which option do you often find yourself picking when it comes to desserts? I'm a chocolate girl myself, but in the summer months I tend to sway more to the fruity, fresh and lighter sweets. So I was originally planning to make a Key Lime Pie flavored cupcake for this month's post to embrace some of the fresh flavors and colors of summer. Well I'm sure you are wondering, so ... Continue Reading
Purple Anemone Cake
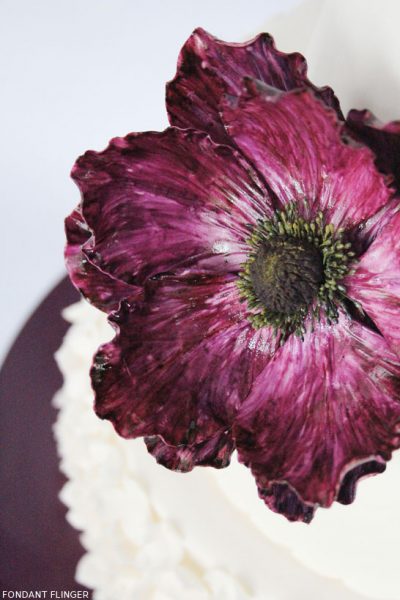
If you're a regular reader, you already know how much I love a gorgeous cake stand. A pretty pedestal is the ultimate accessory for any cake design and it can make or break your entire look. And honestly, can you ever have too many? Ummm, let me think for a millisecond... Nope. You can never have too many cake stands! Which made the launch of the new Simply Stunning Collection from Sarah's Stands news definitely worth noting. And if you've been reading for awhile, you know that I'm a ... Continue Reading
Sugar Ranunculus by Petalsweet
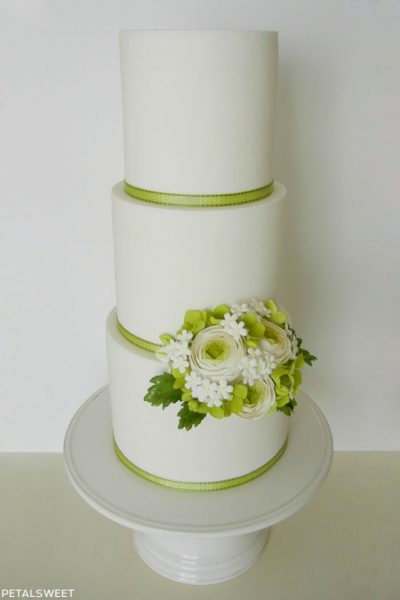
You know it's going to be a good day when the talented Jacqueline Butler of Petalsweet stops by! Jacqueline is an award-winning sugar artist, well known and loved for her meticulous sugar flowers. We were honored to have Jacqueline join us last winter with this sugar flower tutorial. And we're absolutely thrilled to have her back again today. This time she's enchanting us with her incredible spring flowers! With soft whites and shades of green, this arrangement is sophisticated, fresh and ... Continue Reading
Creamsicle Cupcakes

Our contributor, Lauren Kapeluck of EllenJay Events, is back with a delicious new recipe.... It might only be May but the ice cream man has been driving down my street for well over a month now. Every time I hear his musical truck all I can think about are drumsticks, ice cream sandwiches and popsicles. It reminds me that the warm weather is here to stay and it's time to start stocking my freezer full of cool summer treats! So thank you Mr. Ice Cream Man for inspiring me to create these ... Continue Reading
Ruffles & Dahlias Cake
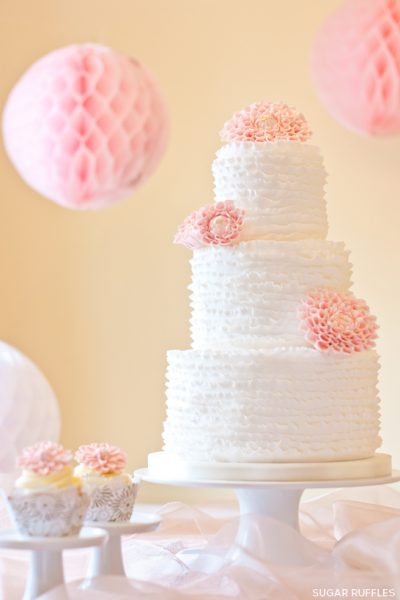
Hello heavenly honeycomb! The latest trend for 2013 is all about this graphic hexagonal pattern. Honeycomb prints are popping up in everything from fashion to interior design this spring. We've been loving on honeycomb ever since the Spring of 2012, when we featured this honeycomb cake. And now we're smitten with another new spin on honeycomb. Today's featured cake is a more of a subtle nod to this growing trend, celebrating the honeycomb structure of a dahlia flower with blooms that take ... Continue Reading
DIY: Watercolor Painted Cake
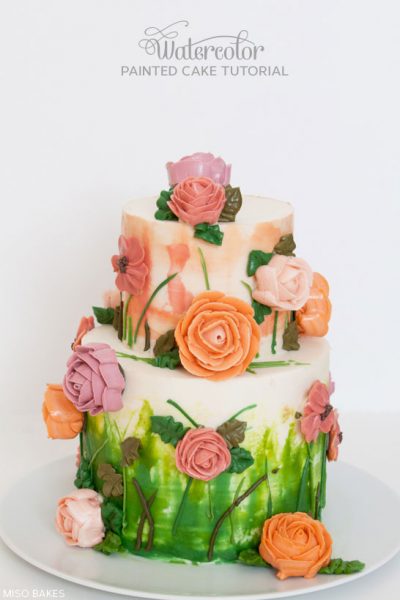
Our contributor, Miso of Miso Bakes, is here with a new tutorial perfect for Spring and Mother's Day. This past December, I traveled to Europe again but this time with my mom accompanying me. Together we visited many museums and looked at hundreds, if not thousands, of paintings. Though I have been to and have seen some of the museums and paintings a few times before, my fingers still tingled in excitement and my heart still smiled at the sight of works by Leonardo da Vinci, Vincent Van Gogh, ... Continue Reading
Beautiful Blooms

Let's talk about pretty petals, shall we? But I don't mean your ordinary, run of the mill, sugar flowers. I'm talking an entire day's worth of beautiful blooms. Delicate, graceful, blooms. Hand cut and placed with precision. Grouped and bunched and snuggled together into an oh-so-beautiful bouquet. Because that's exactly what today's cake has in store for us. An entire tier of gorgeous blooms clustered together in a frilly, almost ruffle-like, pattern. Add in a touch of lace and some ... Continue Reading
Spiced Chocolate & Churros Cake
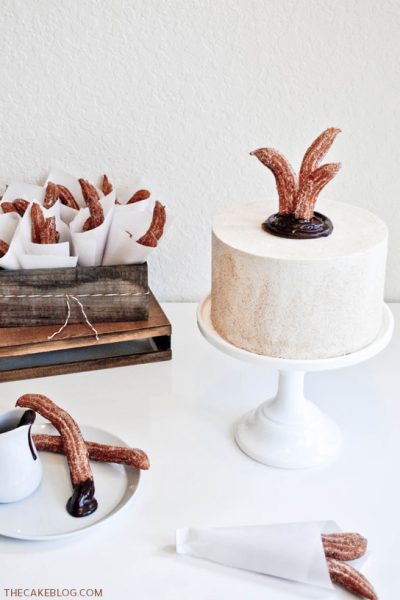
If you caught my vanilla cake recipe post last week, you may remember that I was feeling a little vanilla about vanilla. After all these years, my love affair with vanilla cake had grown tired and stale. Just like any relationship going through a rough patch, we needed to zest things up a bit! So I put everything on hold and spent some serious quality time with this recipe. And I'm happy to report that today is a new day for vanilla cake. One that is fresh, bright and oh-so-delicious. Even ... Continue Reading
Recipe : Classic Vanilla Cake
Today's post is a two-parter. One part recipe. One part love story. A love story that started years ago, way back in high school. At first, this love of mine was not accepted by my family. You see, my family had always been a chocolate cake family. Chocolate cake always and forever, all birthdays and all celebrations. But then, I met vanilla. I can remember one birthday asking my mom for vanilla cake. Still to this day I'm not sure if she didn't hear me or thought I was joking. But ... Continue Reading
Butterfly Garden Cake
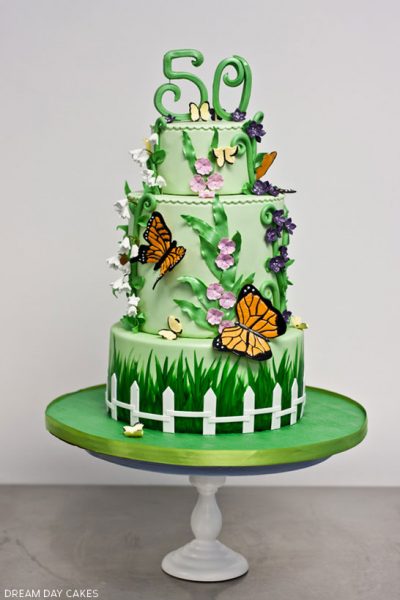
Today's gorgeous cake design highlights the beauty of nature. And I think today is a good day to stop and focus on the beauty found in the world around us. To appreciate a flower blossom and each of its delicate petals. To marvel at the grace of a fluttering butterfly. And to simply stop and smell the flowers. Only in this case, we're stopping to smell the cake. Which I can only imagine smelled divine with all of its sweetness. Created by Yeni Monroy and her team at Dream Day Cakes®, ... Continue Reading
Recipe: Funfetti Cupcakes
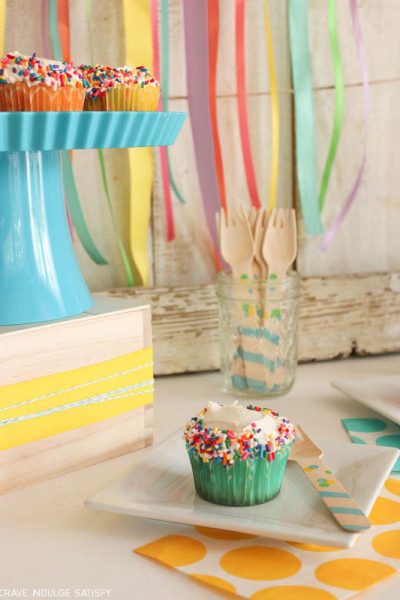
Funfetti Cupcakes - easy homemade funfetti cupcake recipe, made from scratch, with sprinkles and fluffy vanilla buttercream frosting. Created by our contributor, Lauren Kapeluck of EllenJay Events. This month's cupcake recipe can be summed up with one word: FUN! Inspired by some multi-colored cupcake wrappers and sprinkled inside and out with my favorite rainbow jimmies, we are venturing into the world of Funfetti Cupcakes today! Just saying the word funfetti makes me happy and it ... Continue Reading
From Dress to Cake
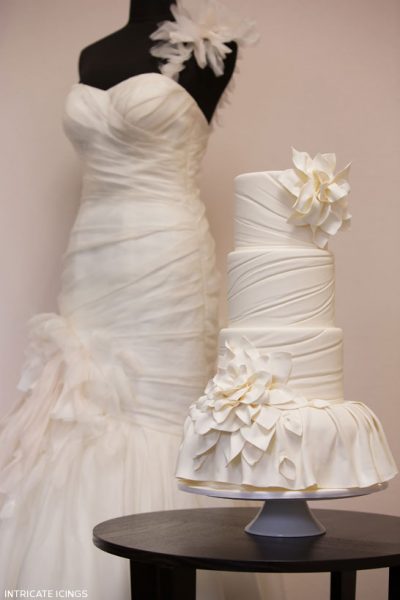
It's time for another fabulous fashion-inspired post! For more than a year now, we've been swooning over cake designs inspired by glamorous gowns. And we all have come to know and love the 'from dress to cake' concept. But you may not realize that our very first 'from dress to cake' post featured today's baker. The talented Rachael Teufel, of Intricate Icings Cake Design in Erie, Colorado. Ever since that very first post, we've enjoyed watching Rachael take dresses of all styles and turn ... Continue Reading
Classic Nautical Cake
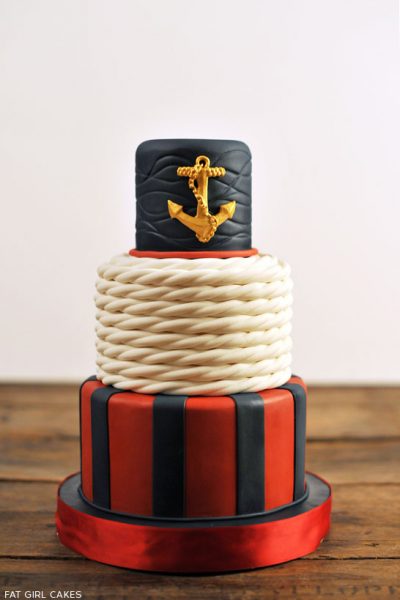
Get ready to set sail with today's helping of nautical inspiration. I'll admit it. I am obsessed with any and all things nautical. I know many of you are too! There is something so fresh, clean and downright summery about the nautical look. The crisp red, white and blue color scheme paired with stripes is always a classic. And I'm especially fond of decorating with woven nautical rope. Whether wrapped around a hurricane vase or lantern, a little touch of rope adds charm and texture. So ... Continue Reading
- « Previous Page
- 1
- …
- 8
- 9
- 10
- 11
- 12
- …
- 16
- Next Page »
