It's finally March! And how can we NOT be excited about all the wonderful occasions this month brings? Soon we'll welcome the official first day of spring, the weather will turn, flowers will sprout, schools will be out for spring break and then Easter will arrive. Doesn't all of that just sound marvelous? But first things first. Saint Patrick's Day! Growing up with a red-headed Irish grandmother, we knew that green was mandatory on St. Patrick's Day... or you would pay the price in pinches. ... Continue Reading
Search Results for: patrick
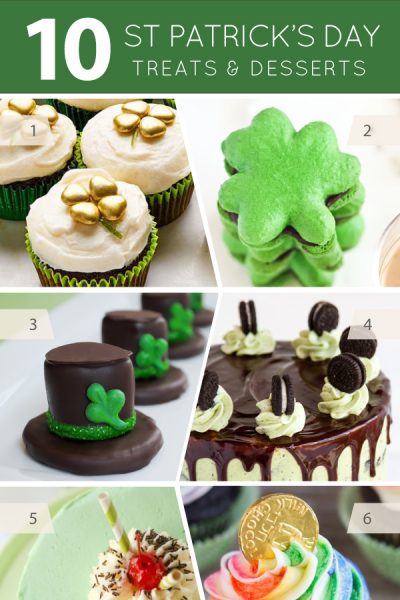
St. Patrick Day Desserts
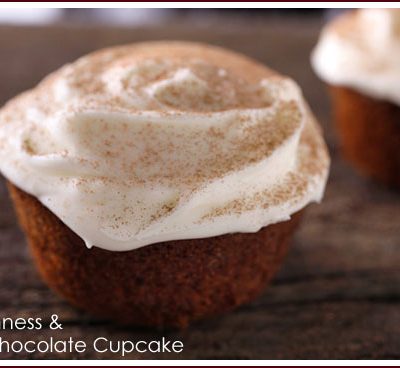
Top 'o the morning to you! I hope you have your green on because you won't find any here today. Crazy, I know! Instead of featuring traditional green St. Patrick's Day recipes, I thought we'd take a look at a few new ways to celebrate. These Guinness inspired recipes from Chow.com are a fun way to get your Irish fix for the day. Pairing the traditional Irish stout, Guinness, with chocolate is a great combination. So why not try cooking with these two ingredients? Whether it's in the form ... Continue Reading
Inspiration Board: St. Patrick’s Day
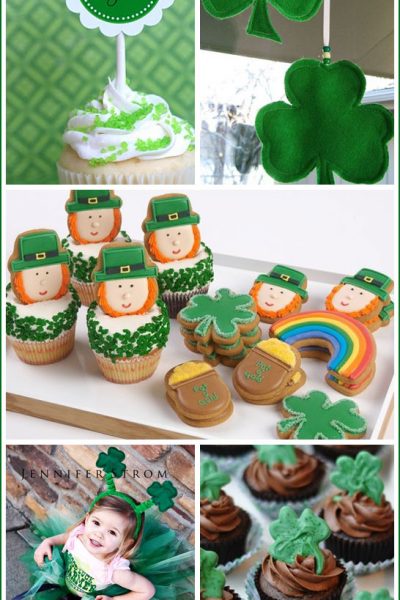
Growing up with a red-headed Irish grandmother, we knew that green was required on March 17th! With St. Patrick's Day coming up on Thursday, I thought we'd take a look at some delightfully green sweets and treats. From shamrocks to cupcakes and tutus, these charming ideas will help make your St. Paddy's Day special. {clockwise, starting at top left:} Free St. Patrick's Day Printables from TomKat Studio. Lucky you is right! Learn how to make these hanging Felt Shamrocks on Skip To ... Continue Reading
Coconut Cake
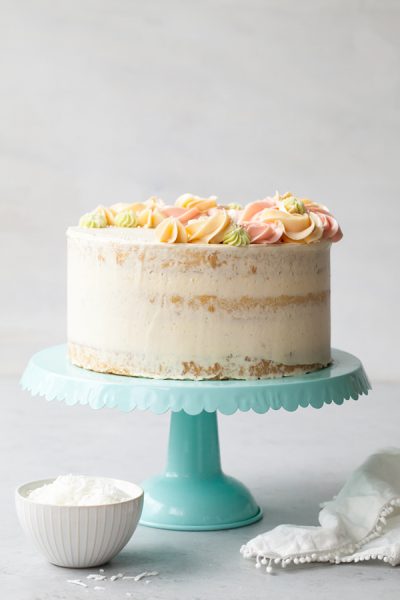
Coconut Cake - homemade coconut cake with creamy coconut milk, brushed with coconut syrup to keep it extra moist, and topped with vanilla bean buttercream frosting. A new layer cake recipe by our contributor, Tessa Huff. It seems like spring is full of mini milestones leading up to summer. We’ve just had Day Light Savings, Pi(e) day and St. Patrick’s Day, and we now gearing up for Easter and Mother’s Day. Perhaps spring is packed with all of these holidays to help get us through the ... Continue Reading
10 Gorgeously Green Cakes
Happy St. Patrick's Day! Do you have your green on? Because we're getting our green on! We're spending today loving on some amazing cakes in every shade of green. These cakes are not filled with Leprechauns or shamrocks, rainbows or pots of gold. Instead, they are incredibly lovely designs with hints of green, perfect for any time of year. Mint green, emerald green, moss green, sage green -- you name it! Along the way, we'll welcome back some of our favorite cake artists while also ... Continue Reading
10 Watercolor Cakes
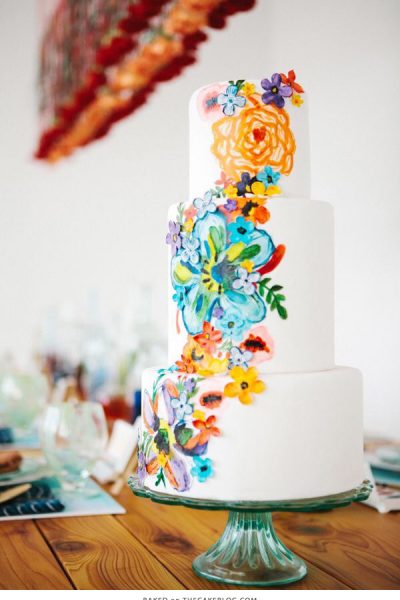
Watercolor cakes have been popping up on The Cake Blog since 2012 and we love seeing this trend continue to grow and evolve. Today we're crushing on a fresh batch of designs, each created with the soft swirls and mixed shades of watercolor. From hand-painted florals to structured patterns, tranquil colors to layers of vibrant hues -- this collection of cake inspiration has a little something for everyone. Along the way, we'll welcome back some of our favorite cake artists while also ... Continue Reading
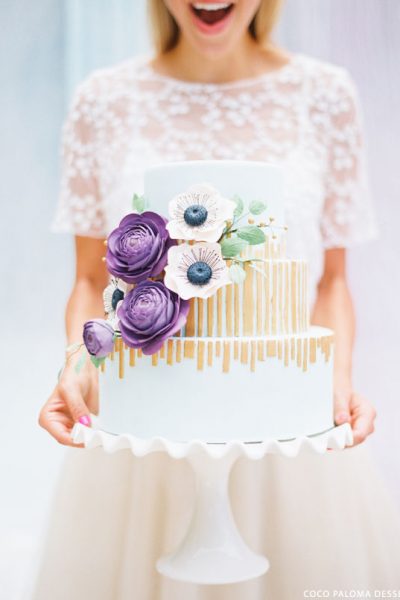
2015 Wedding Cake Trends : Relaxed Bohemian
It's day seven of our brand new cake series - The 2015 Wedding Cake Preview! We're spending two weeks oohing and aahing over marvelous cake designs and getting the scoop on 2015 cake trends from the ladies who know. Top cake designers were asked to predict which cake trends will be hot in 2015. Based on their insights, this talented group got busy creating innovative new cakes, exclusively for this cake series and especially for you! I hope you'll join us as we debut a new trend-inspired ... Continue Reading
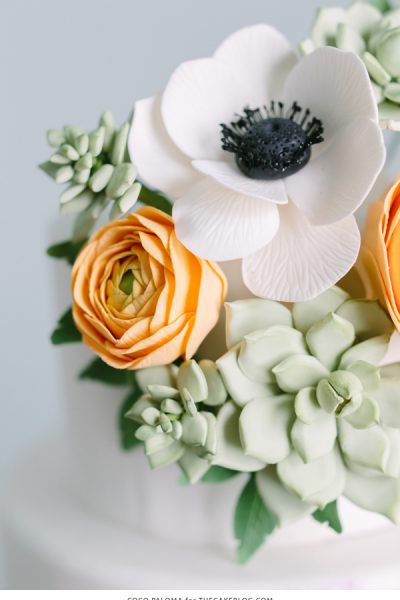
Fall Wedding Cake Inspiration
Today's feature is one of those posts that I simply cannnot wait for you to see! It's packed full of pretty and just bursting with beautiful details. It comes to us from Paloma Efron, owner of Coco Paloma Desserts located in Austin, Texas. If you don't already know Coco Paloma -- you're seriously missing out! We've been a fan of Paloma's cakes for years and I'm so excited that she's stopping by the blog today! Not only are these designs elegant and stylish but Coco Paloma Desserts was ... Continue Reading
Green Velvet Cupcakes
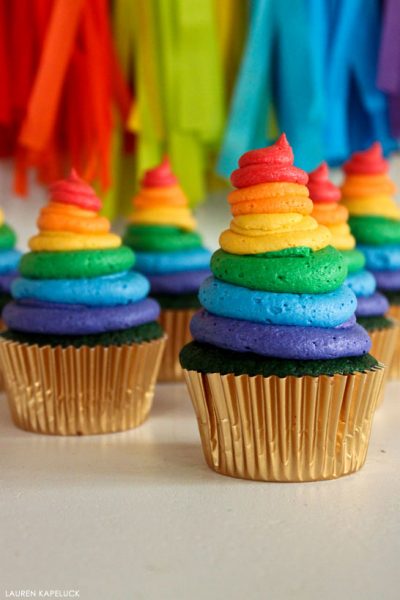
Green Velvet Cupcakes - these cupcakes are the perfect St. Patrick's Day dessert with their green velvet cake and rainbow buttercream frosting! Created by our contributor, Lauren Kapeluck of EllenJay Events. As we prepare to say goodbye to winter and hello to spring, I have just the cupcake to get you all excited! It's bright and cheerful and full of color! It has a little something to do with RAINBOWS! And since St. Patrick's day is coming up too, I thought I would throw in a little ... Continue Reading
Classic Nautical Cake

Get ready to set sail with today's helping of nautical inspiration. I'll admit it. I am obsessed with any and all things nautical. I know many of you are too! There is something so fresh, clean and downright summery about the nautical look. The crisp red, white and blue color scheme paired with stripes is always a classic. And I'm especially fond of decorating with woven nautical rope. Whether wrapped around a hurricane vase or lantern, a little touch of rope adds charm and texture. So ... Continue Reading
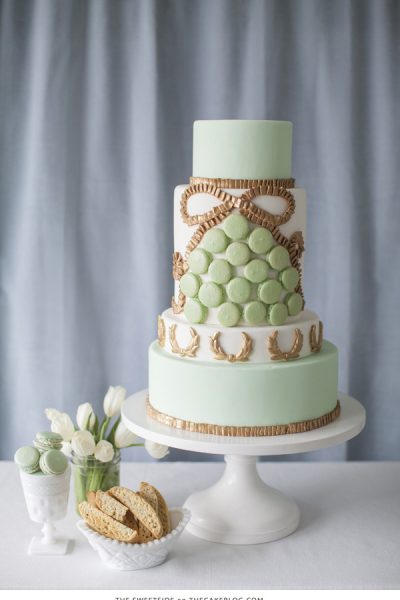
Mint, Blush & Gold Flowers
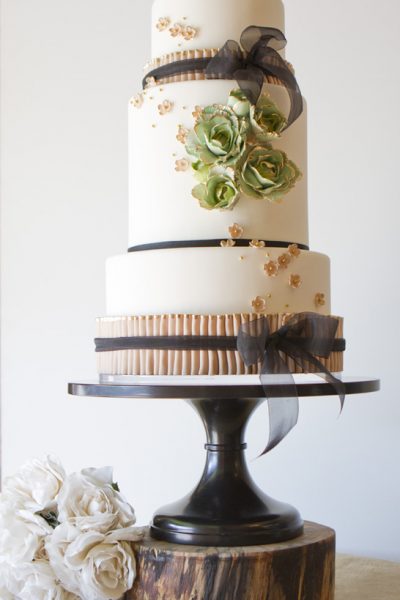
In case you didn't get enough on St. Patrick's Day, we have a little touch of green to start off your week. But we're not talking cutesy leprechaun green here. We're talking gorgeous mint green with elegant touches of gold. Paired with a blush pink and a contrasting black, creating one hot color combo for spring. Delicate roses and tiny pink blossoms get an extra touch of fabulous with gilded gold accents. And then there's the perfectly ruffled fondant ribbon. Dancing around two of the ... Continue Reading
DIY: Shamrocks & Lucky Clovers Cake
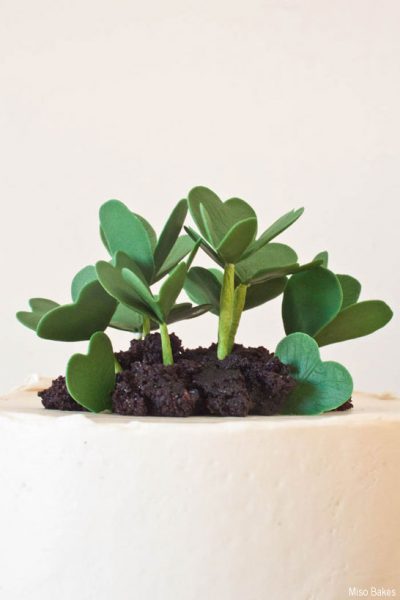
Our contributor, Miso of Miso Bakes, is here with a new tutorial for St. Patrick's Day … As many of you know, four-leaf clovers symbolize luck. However, did you know three-leaf clovers (shamrocks) symbolize happiness? Many years ago, I stumbled upon a quote pertaining to the two clovers that read something like this, "People step on happiness to find luck." So true. For St. Patrick's Day this year, I created a cake that represented both happiness and luck! I made shamrocks and ... Continue Reading
Pearlescent Shades of Gray Cake
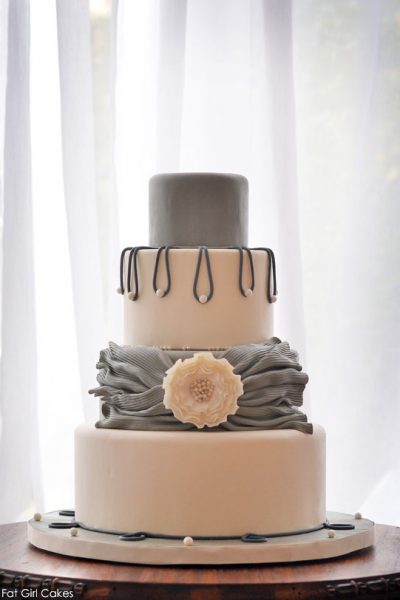
Oh for the love of simple sophistication. There's nothing like a cake with clean lines and a touch of romance to get your heart racing. And that's exactly what we have for you today. Soft creamy white meets several shades of grey in this polished design created by Kristin Kirkpatrick , owner of Fat Girl Cakes in Virginia. A textured grey sash, gathered with a delicate fantasy flower, creates a gorgeous focal point and reason alone to swoon. And then there's the pearls. The oh-so-cultured ... Continue Reading
Purple Ombre Buttercream Cake
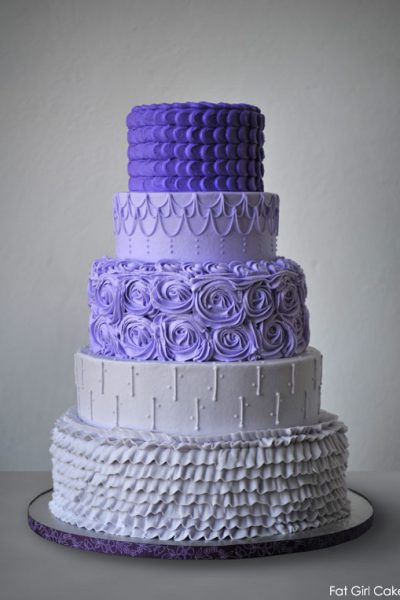
Buttercream. Buttercream. Glorious Buttercream. Today's cake is all about the buttercream. Ruffles, roses, petals, swags, swirls and dots. This cake includes just about every popular buttercream technique from today's cake scene. Armed with shades of purple and a piping bag, Kristin Kirkpatrick , owner of Fat Girl Cakes in Virginia, proves that buttercream can be just as fabulous as fondant. Each tier of today's cake boasts a different piping style, giving buttercream lovers something to ... Continue Reading
Best of 2012 : Number 7
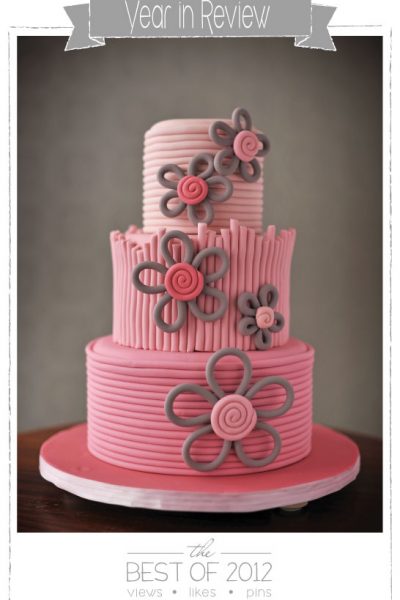
If you're just joining us after the New Year, we're taking a few days to look back at the fabulous cake and party inspiration of 2012. Before jumping into new posts for 2013. So I’ve sifted through the 200+ posts from 2012 to find the posts you loved the most. Based on your pageviews, Facebook likes and Pinterest pins…. we’re counting down your Top 10 Favorite Posts of 2012! And today we have the 7th most popular post… Based on your views, likes and pins…..The7th most popular post of ... Continue Reading
Quilled Flower Cake
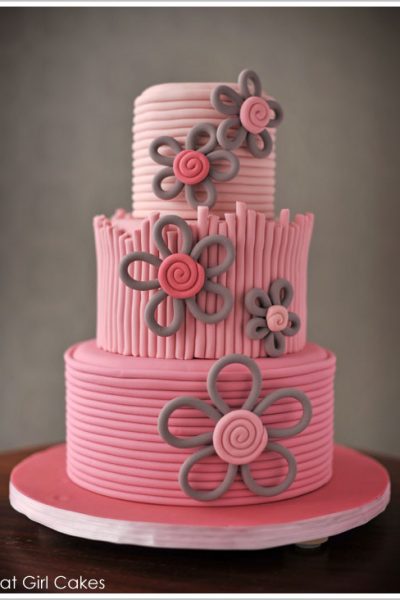
Today is the first day of Spring! We're welcoming in the new season with gorgeous cake perfect for any springtime event. Created by Kristin Kirkpatrick of Fat Girl Cakes, today's cake is new and definitely fresh! Rolls of fondant are wrapped, grouped, stacked and swirled to create an intricate design similar to the art of paper quilling. Paired with a subtle pink ombre effect and rolled fondant flowers that pop, this design is all about modern simplicity. Blooming with beauty, we're loving ... Continue Reading
Recipe: ‘Irish Coffee’ Cupcakes
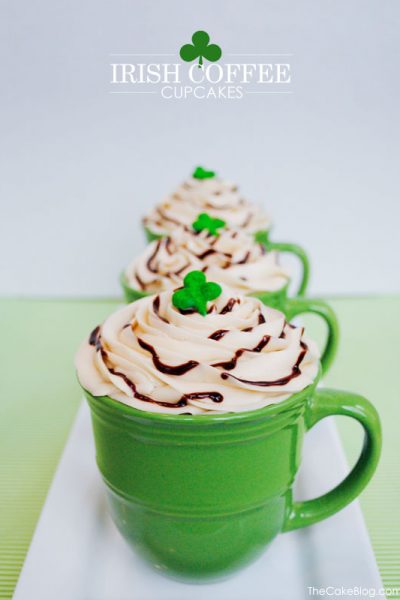
Tomorrow is St. Patrick's Day, so I thought we'd squeeze in one last treat today! All decked out in green coffee mugs and topped with glimmering shamrocks, these cupcakes are a big drink of Irish fun! Chocolate cake is baked right in the mug and then topped with layers of whiskey-infused ganache and espresso buttercream. Chocolate drizzle and a glittering candy shamrock finish the look! Grab your apron because we're whipping up some Irish Coffee Cupakes! Funny thing is... I had an ... Continue Reading
Guinness & Chocolate Dessert Bar
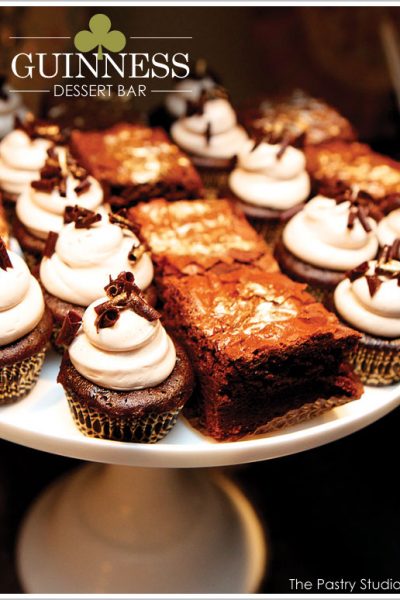
Just in time for St. Patrick's Day, we have an incredible dessert bar to share today. Pairing the traditional Irish stout, Guinness, with chocolate is a popular combination.... especially perfect when baking for St. Patty's Day! From Chocolate Guinness Brownies to Black and Tan Cupcakes, these fluthered goodies were created by Sherri Meyers and her team at The Pastry Studio. They might not have green sprinkles…. but these Irish treats will make your grown up friends smile! Join me as we ... Continue Reading
Leprechaun Hat S’mores
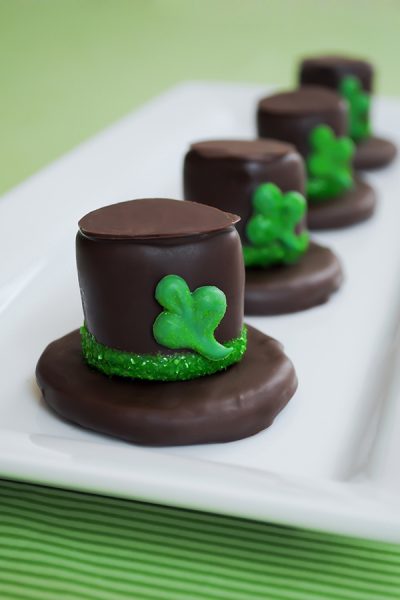
Leprechaun Hat S’mores - a festive St. Patricks day treat that the kids will love! Make this easy green dessert for your St. Patricks Day party! St. Patrick's Day is just around the corner... this Saturday to be exact. To help you celebrate, I've created a new DIY treat full of sweet goodness and glittering shamrocks! I shared it over on the fabulous Hostess Blog and will share it here as well! So whether you're planning a big green bash or simply want a treat to enjoy at home, these ... Continue Reading
Real Party: Chocolate Brown & Green Wedding
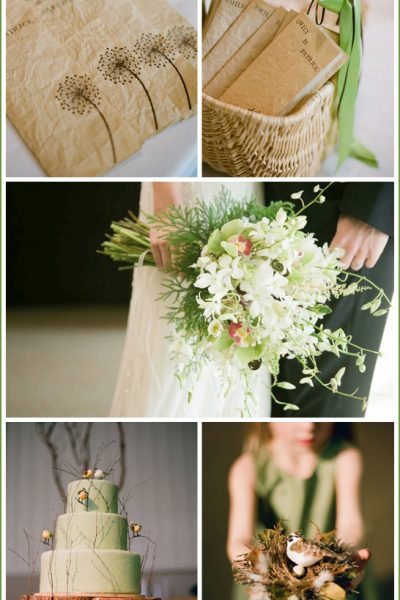
Today's real party is a simply elegant wedding, shared with us by the amazing photographer Tanja Lippert. We've featured Tanja's work before and what can I say other than her images are breathtaking. This wedding included so many quaint little details...it's enough to make a girl giddy! From the chocolate brown and green color scheme to the delightful birds and fern fronds, this wedding is truly a wooded wonderland. I absolutely love this cake! The green fondant creates a stage for the ... Continue Reading
